Revision: 8a9a55c2cb
Edited RepairDesk Connect
@@ -1 +1,81 @@
-New Wiki Page
+In this section, we will give a step-by-step guide on how to Enable RD-Connect and use the unified inbox in the best way possible to save time and convert leads faster through better communication with your customers.
+
+**Step-by-Step Guide:**
+
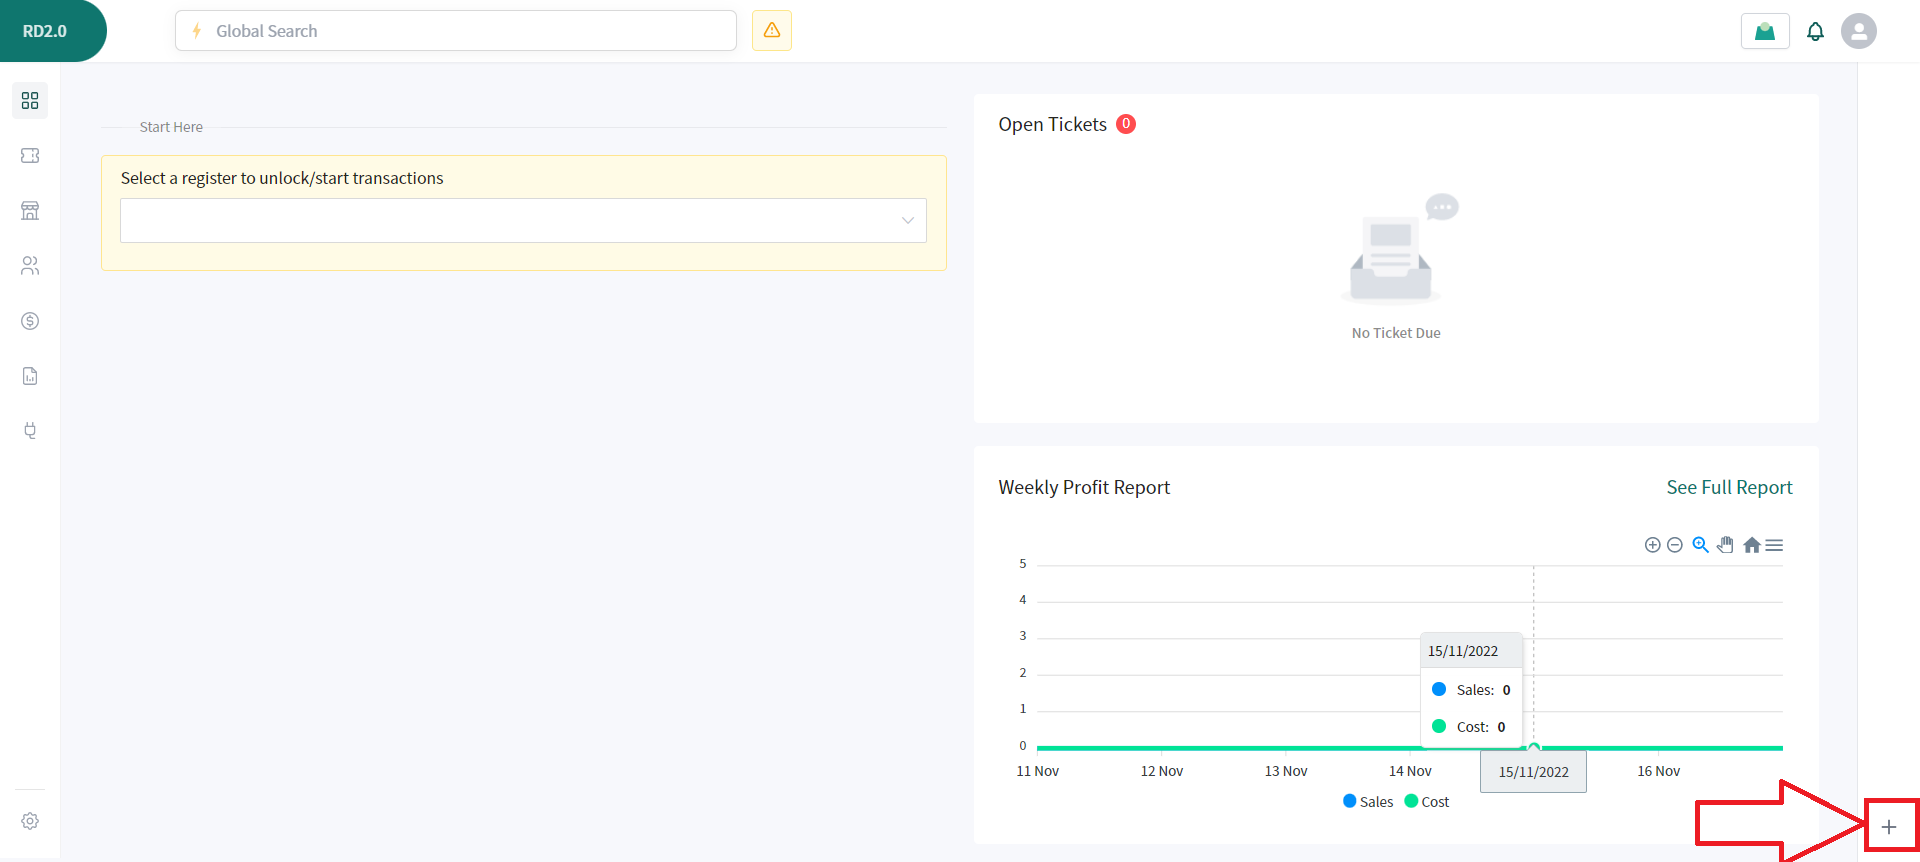
+a. After logging into your POS account. You will see the plus icon of the screen on the right corner of the screen.
+
+
+
+b. Click on the Icon to slide open the drawer.
+
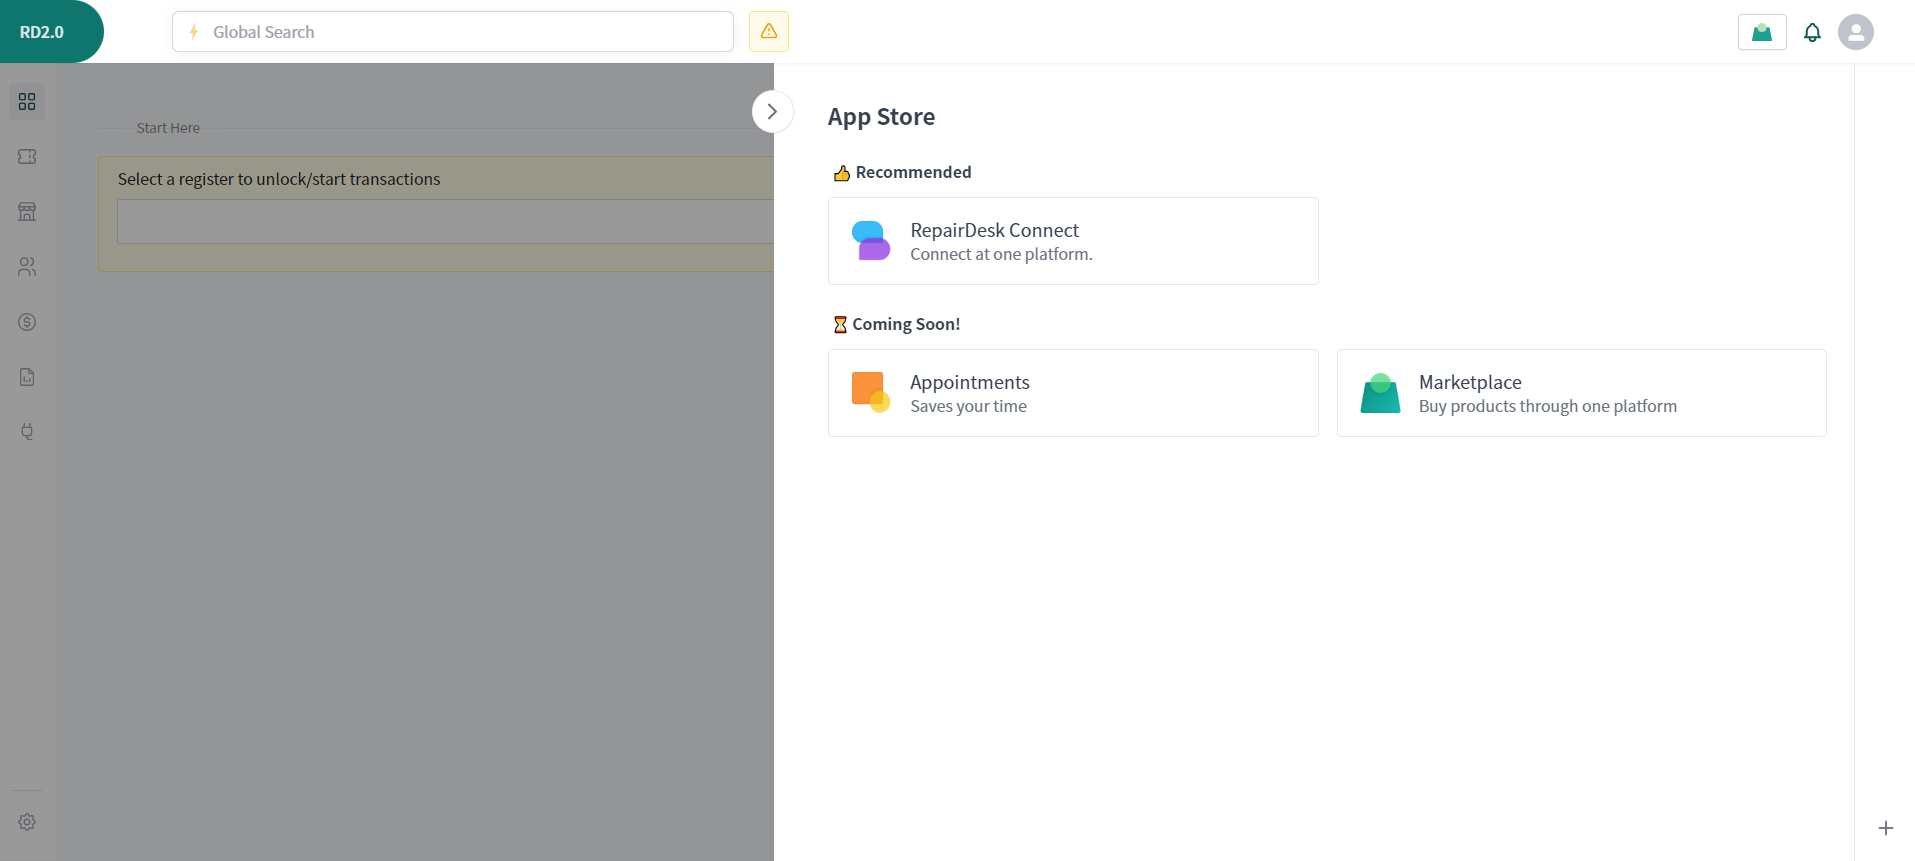
+c. Once the drawer is open, you will be able to see all the available apps in our app store.
+
+
+
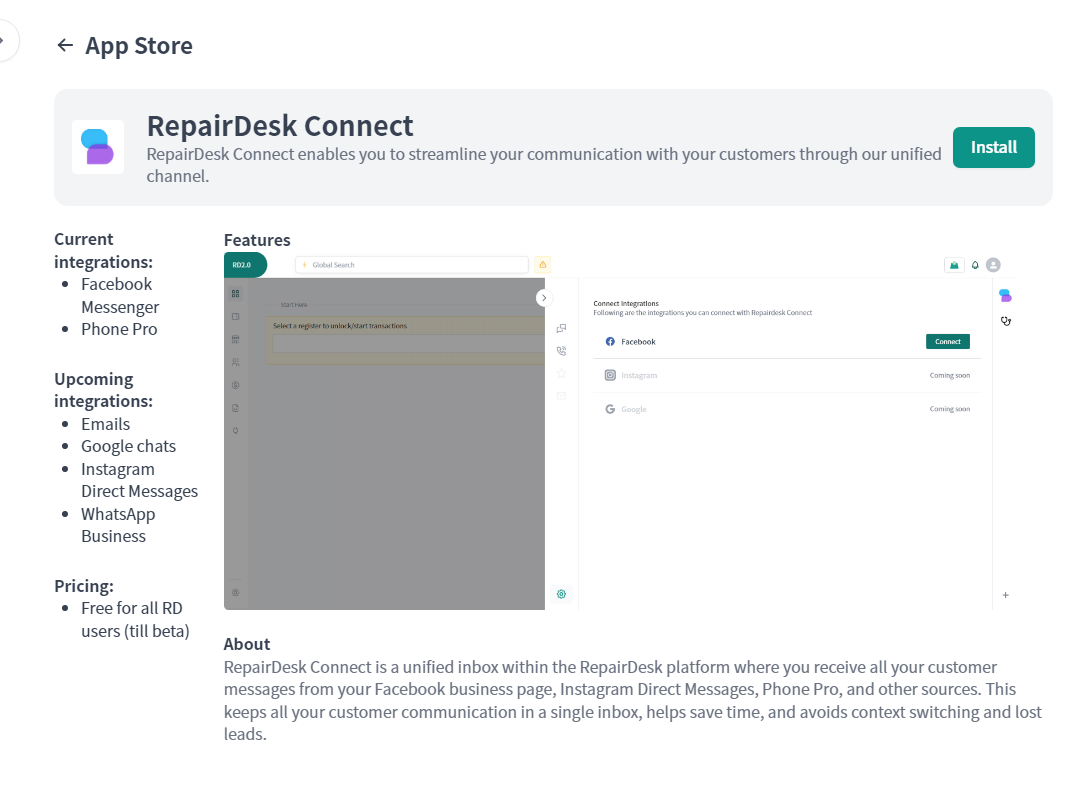
+d. Click on RepairDesk Connect and then install the app.
+
+
+
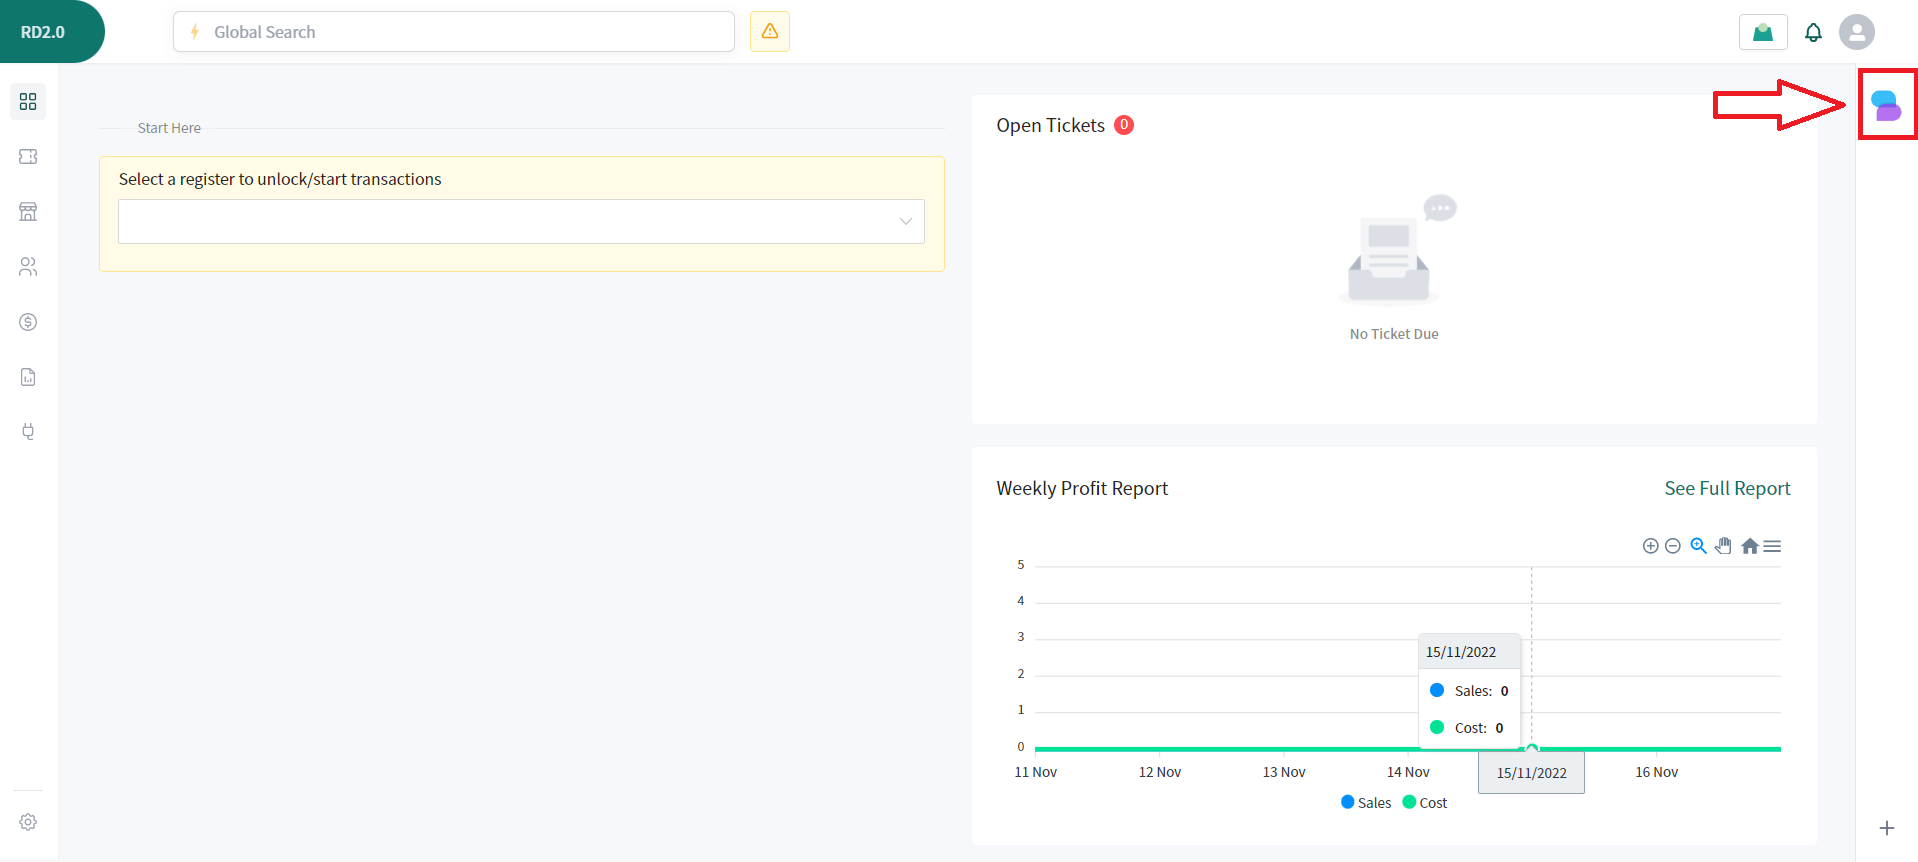
+e. Connect icon will appear on the right side of the screen. Click on the icon to access all your messages and calls.
+
+
+
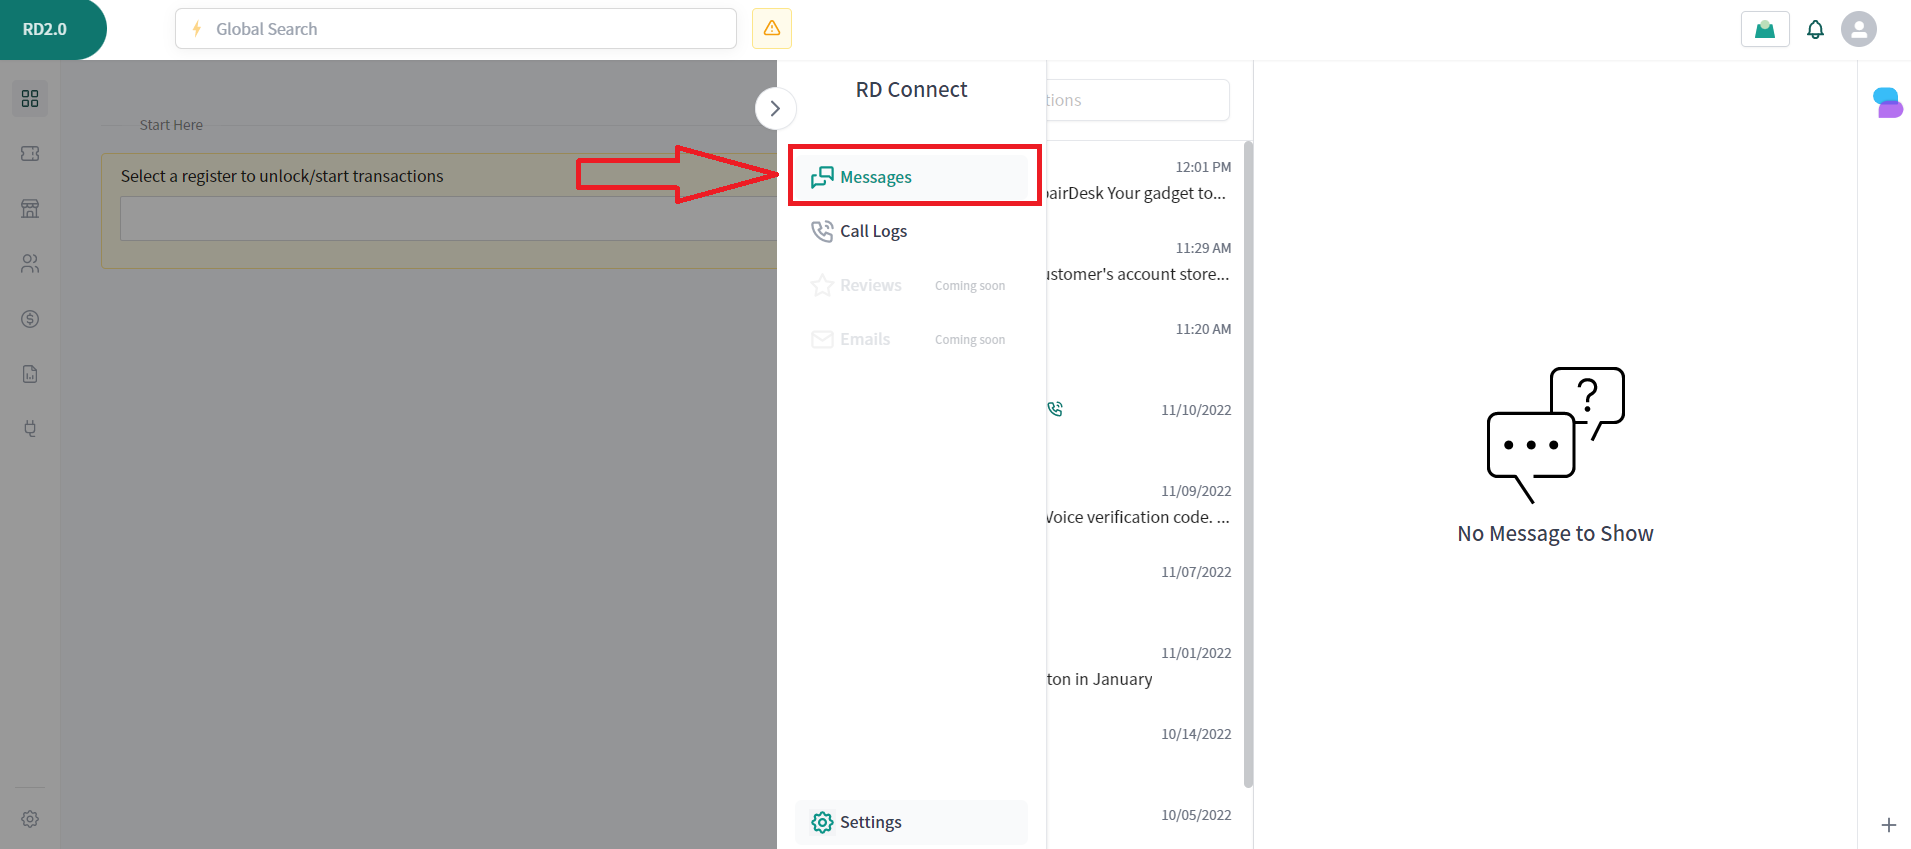
+f. Click on the Messages Icon to view all messages from Phone Pro.
+
+
+
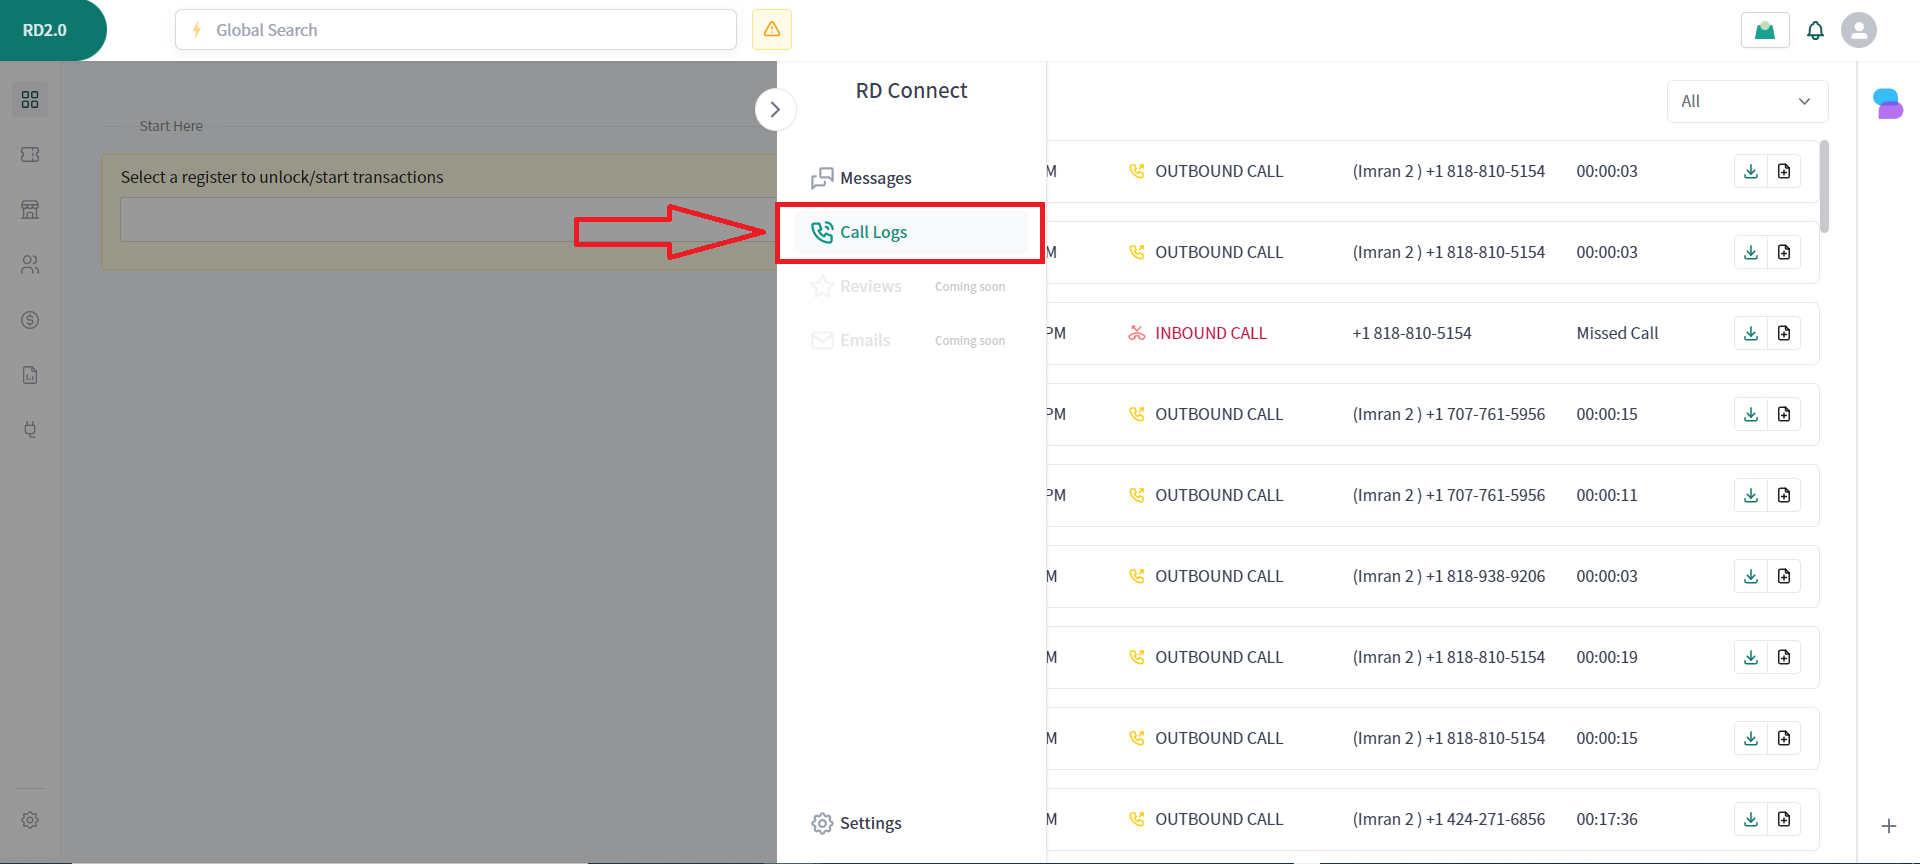
+g. To Access the Call Logs of Phone Pro, click on the Calls Icon on the Bar.
+
+
+
+**For Facebook integration:**
+
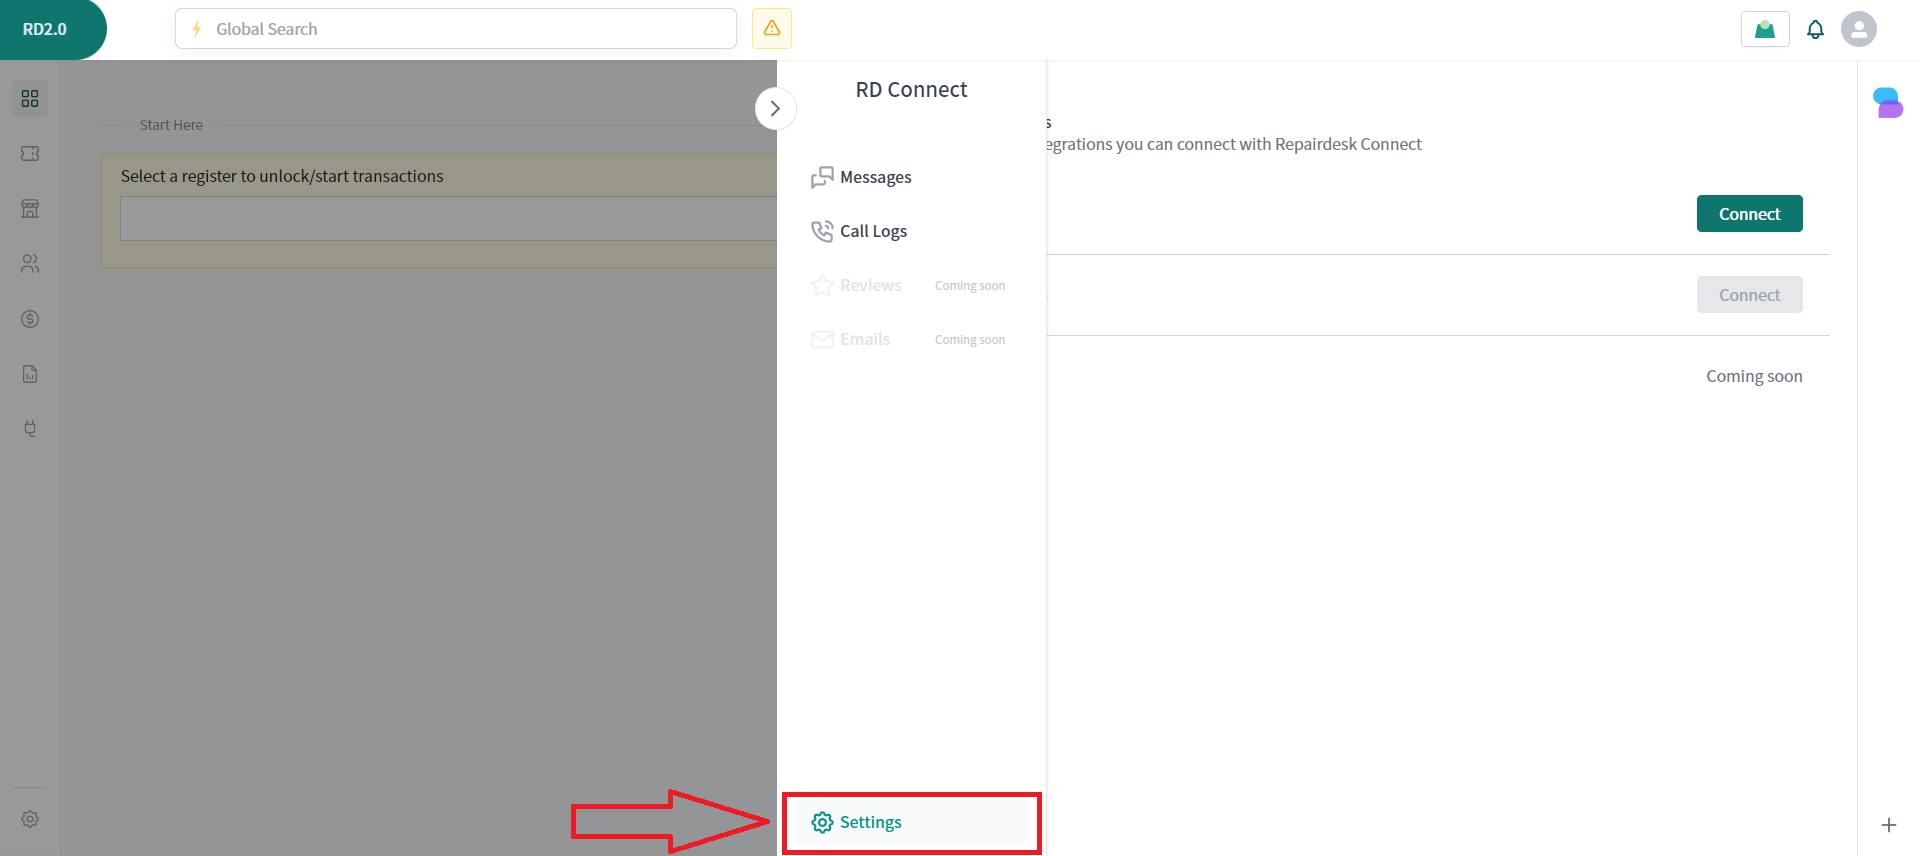
+a. While the Drawer is open, click on the Settings Icon on the bottom left.
+
+
+
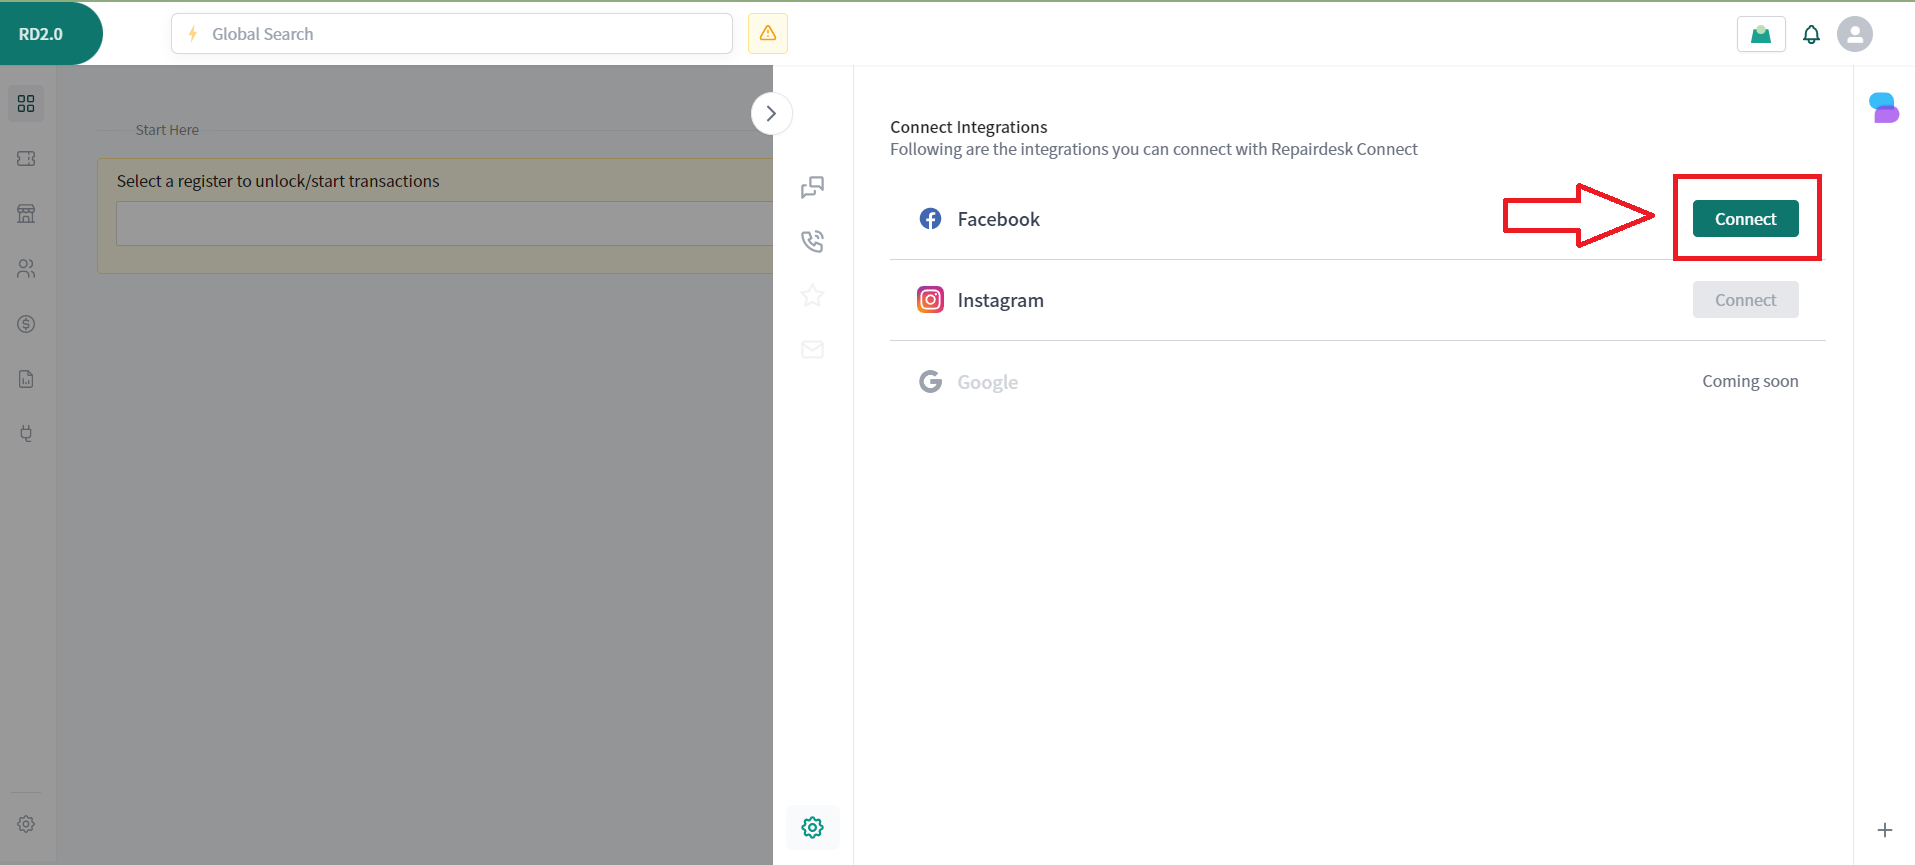
+b. You will be redirected to the Settings page, where you will see options of platforms you can Connect with.
+
+c. Click on the Green Button of Connect.
+
+
+
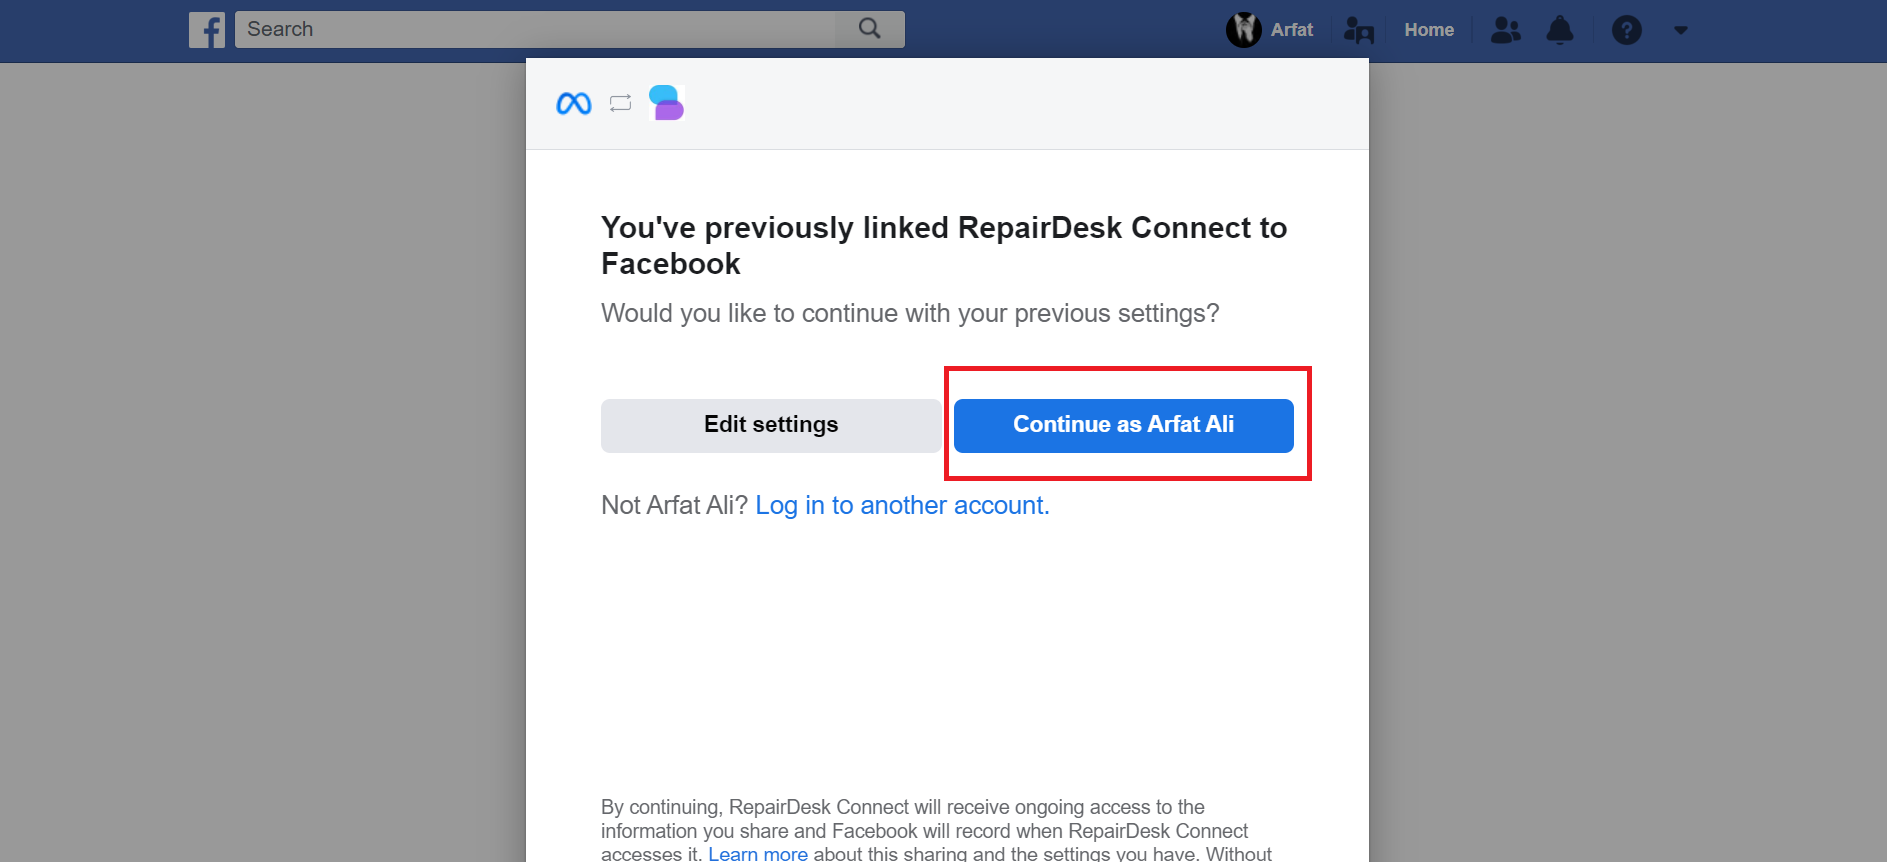
+d. You will be redirected to the Facebook page where you can select your Facebook page and Continue as the Account.
+
+e. Press Continue.
+
+
+
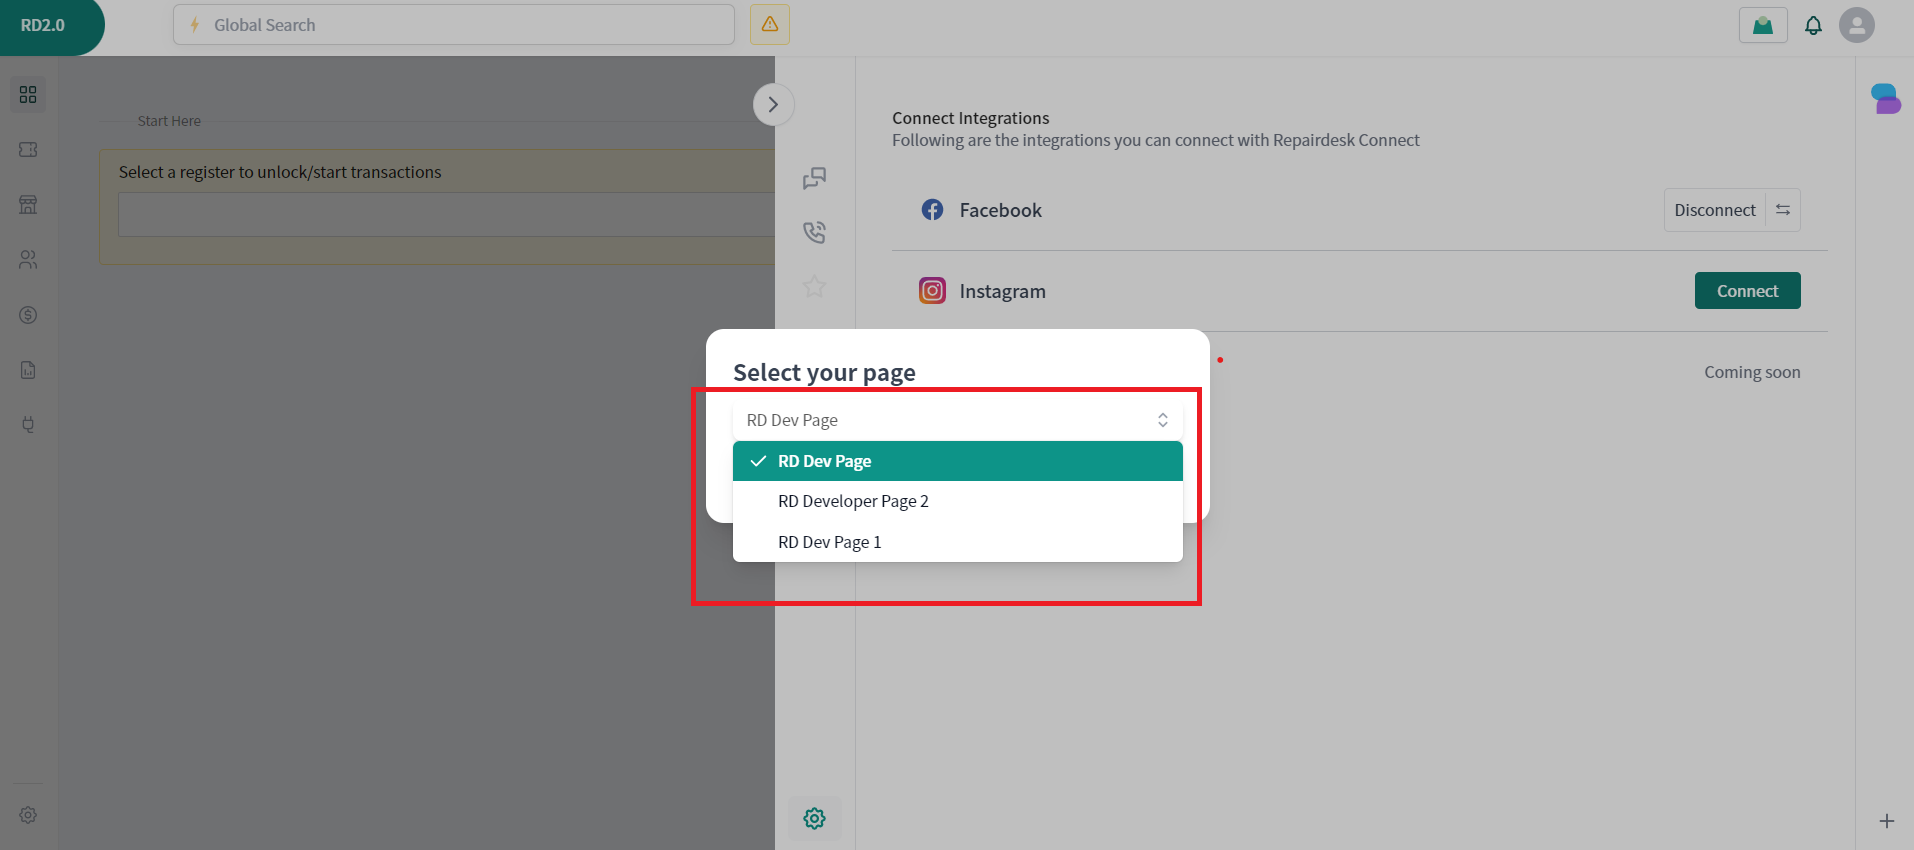
+f. You will be redirected to the Drawer Settings with a dropdown Menu.
+
+g. Click on the Dropdown to Select which Page messages would you like to receive in Connect.
+
+
+
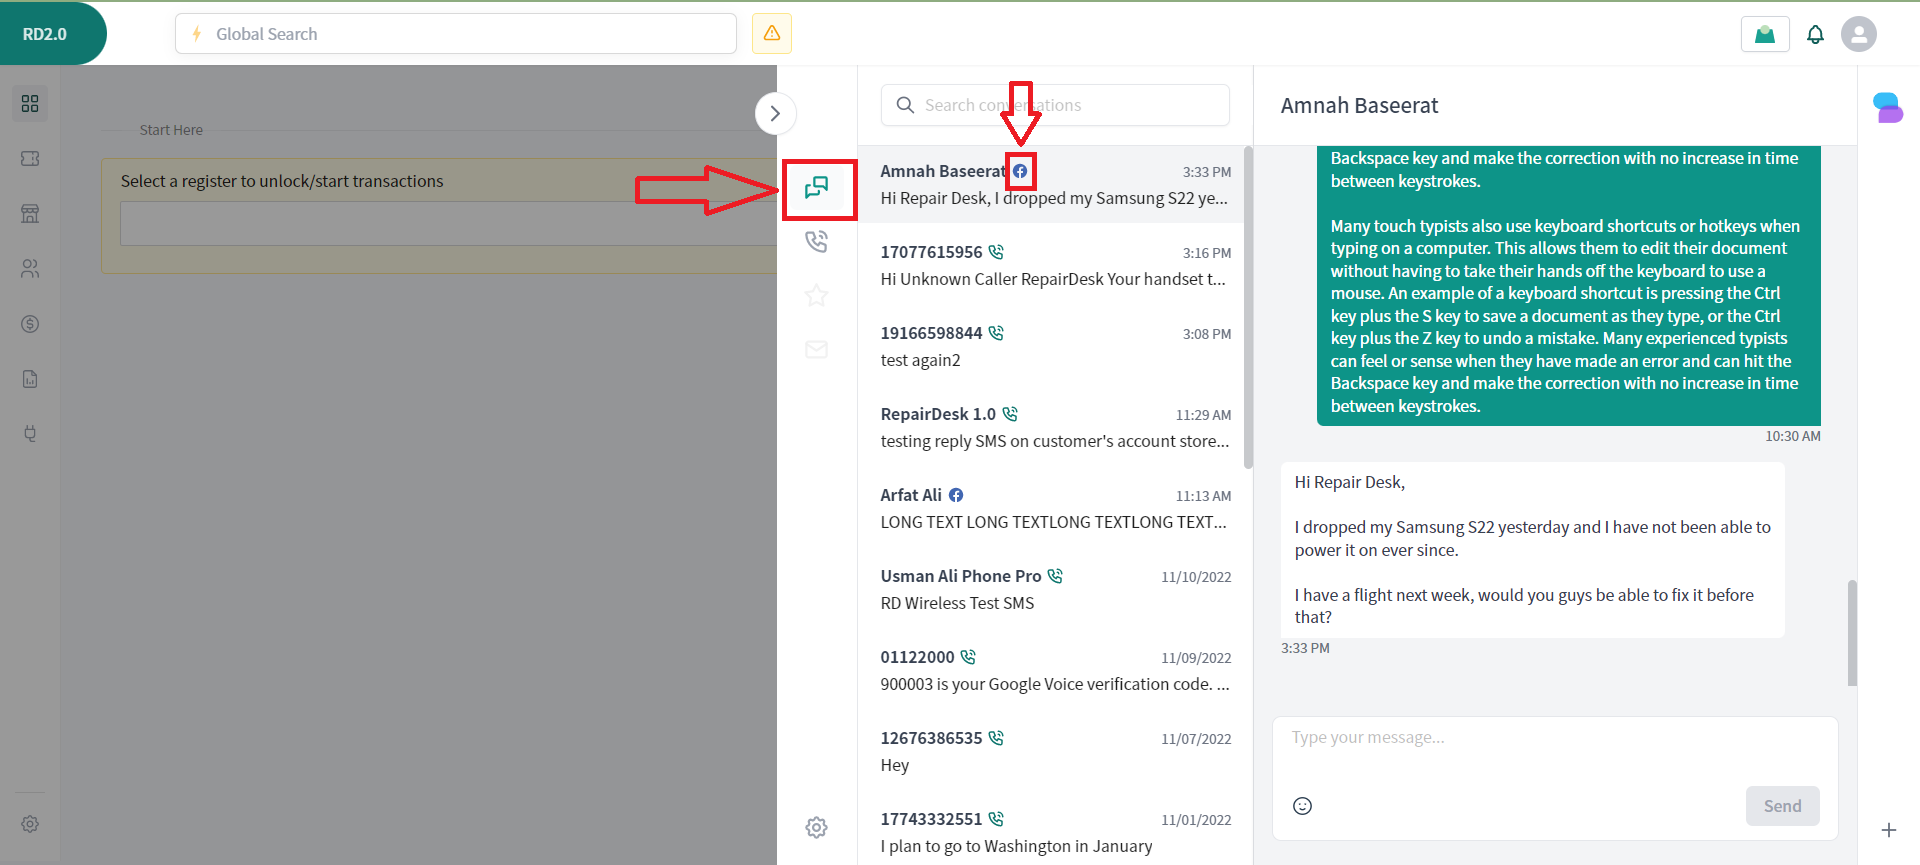
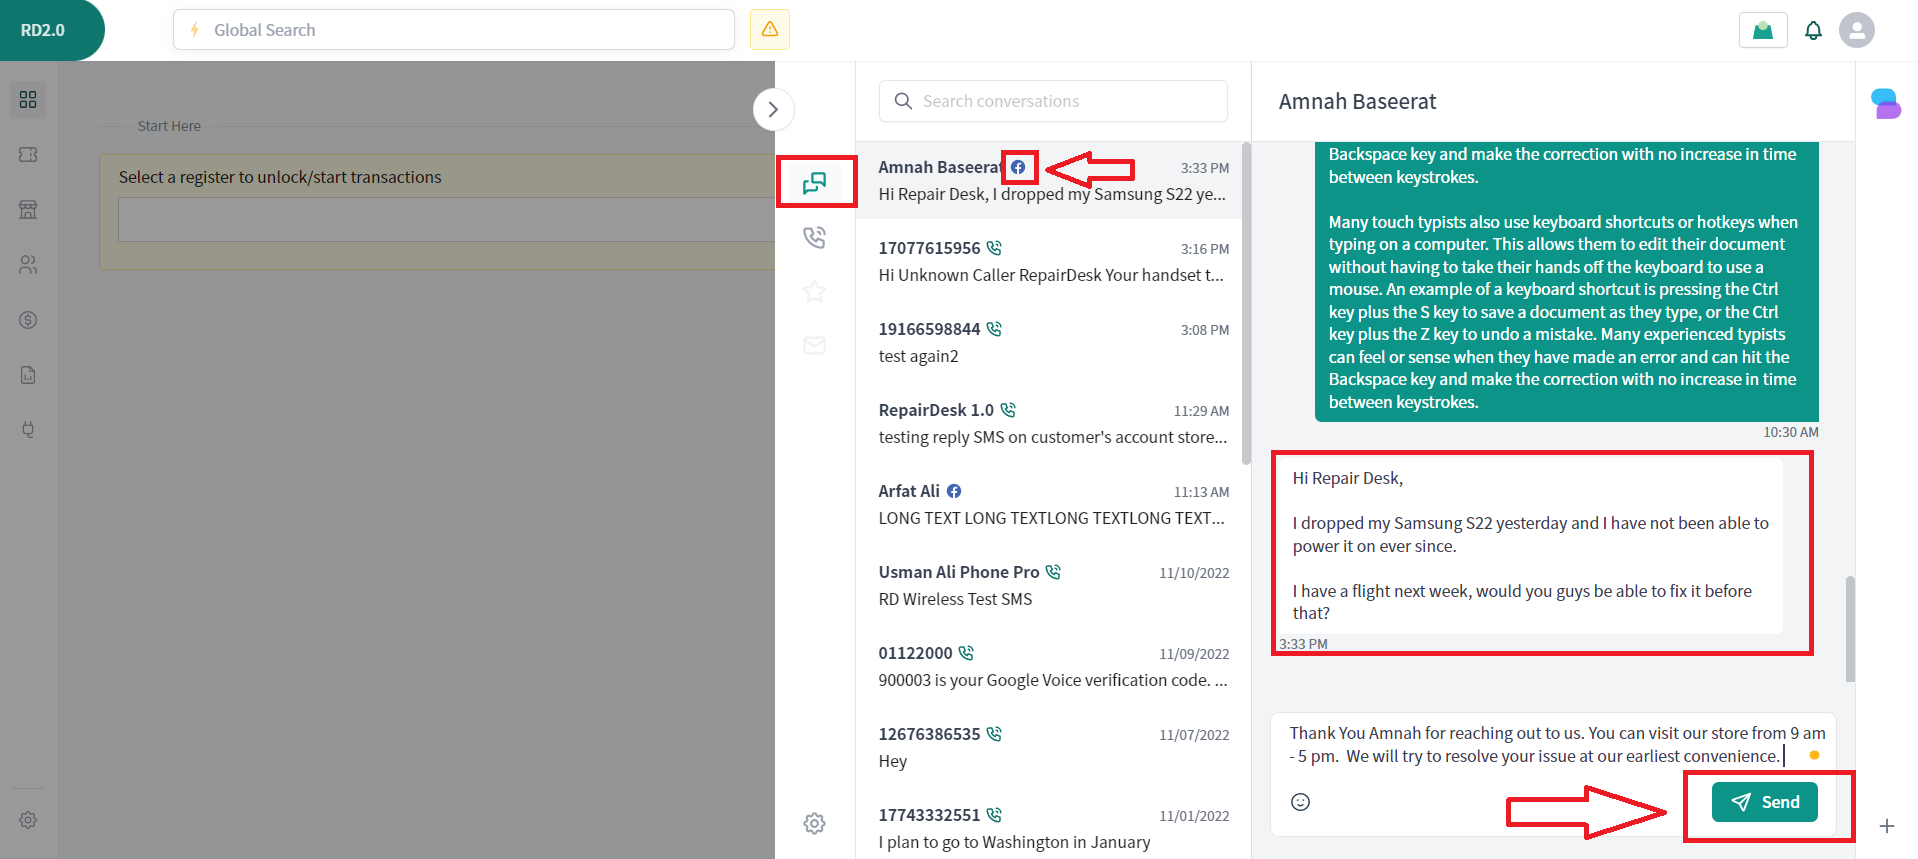
+h. The loader will take a few minutes to fetch your messages from the system and unify them with other platforms. To view the Facebook messages, click on the Message Icon on the Drawer bar on the Left-Hand side. Messages from Facebook will have a small Facebook icon in front of the name of the recipient in the inbox.
+
+
+
+**Conversations:**
+
+a. To reply to customers, click on the recipient name to open the chat in the Inbox. Click on the Chatbox to type your message and press the green Send button to send the message.
+
+
+
+b. To Use Emojis, click on the small emoji icon which will open up an emoji pop-up with all options of emoticons.
+
+**Call Logs:**
+
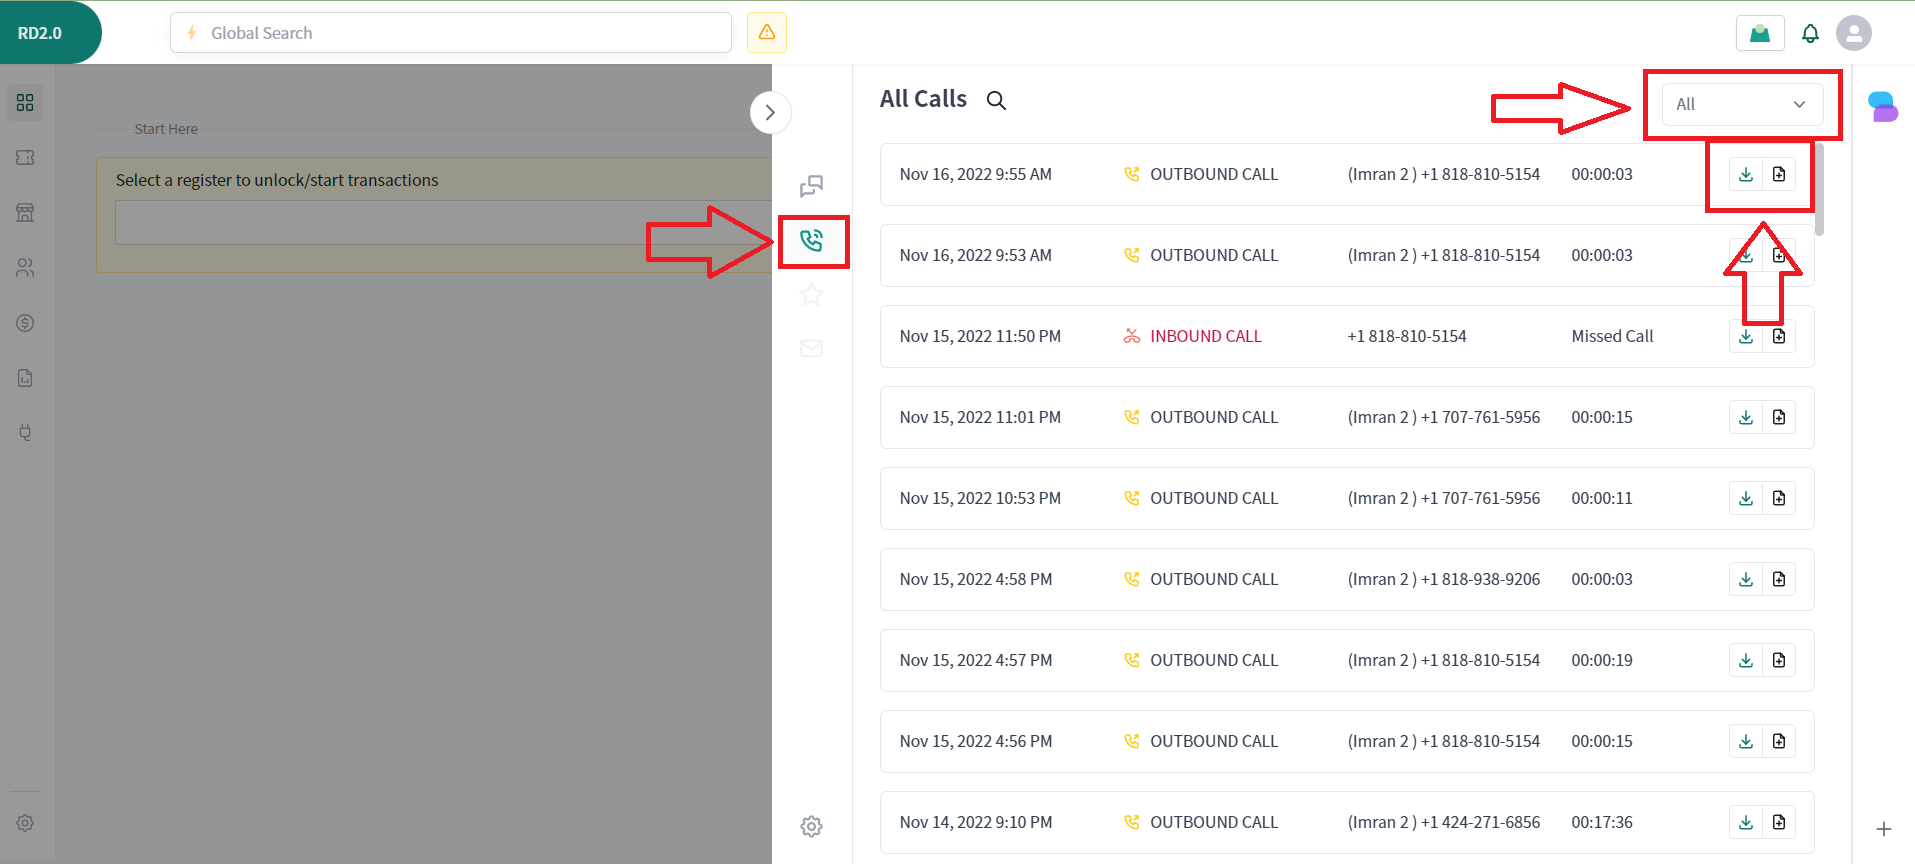
+a. Call Logs will appear by clicking on the Call Icon in the drawer on the left bar.
+
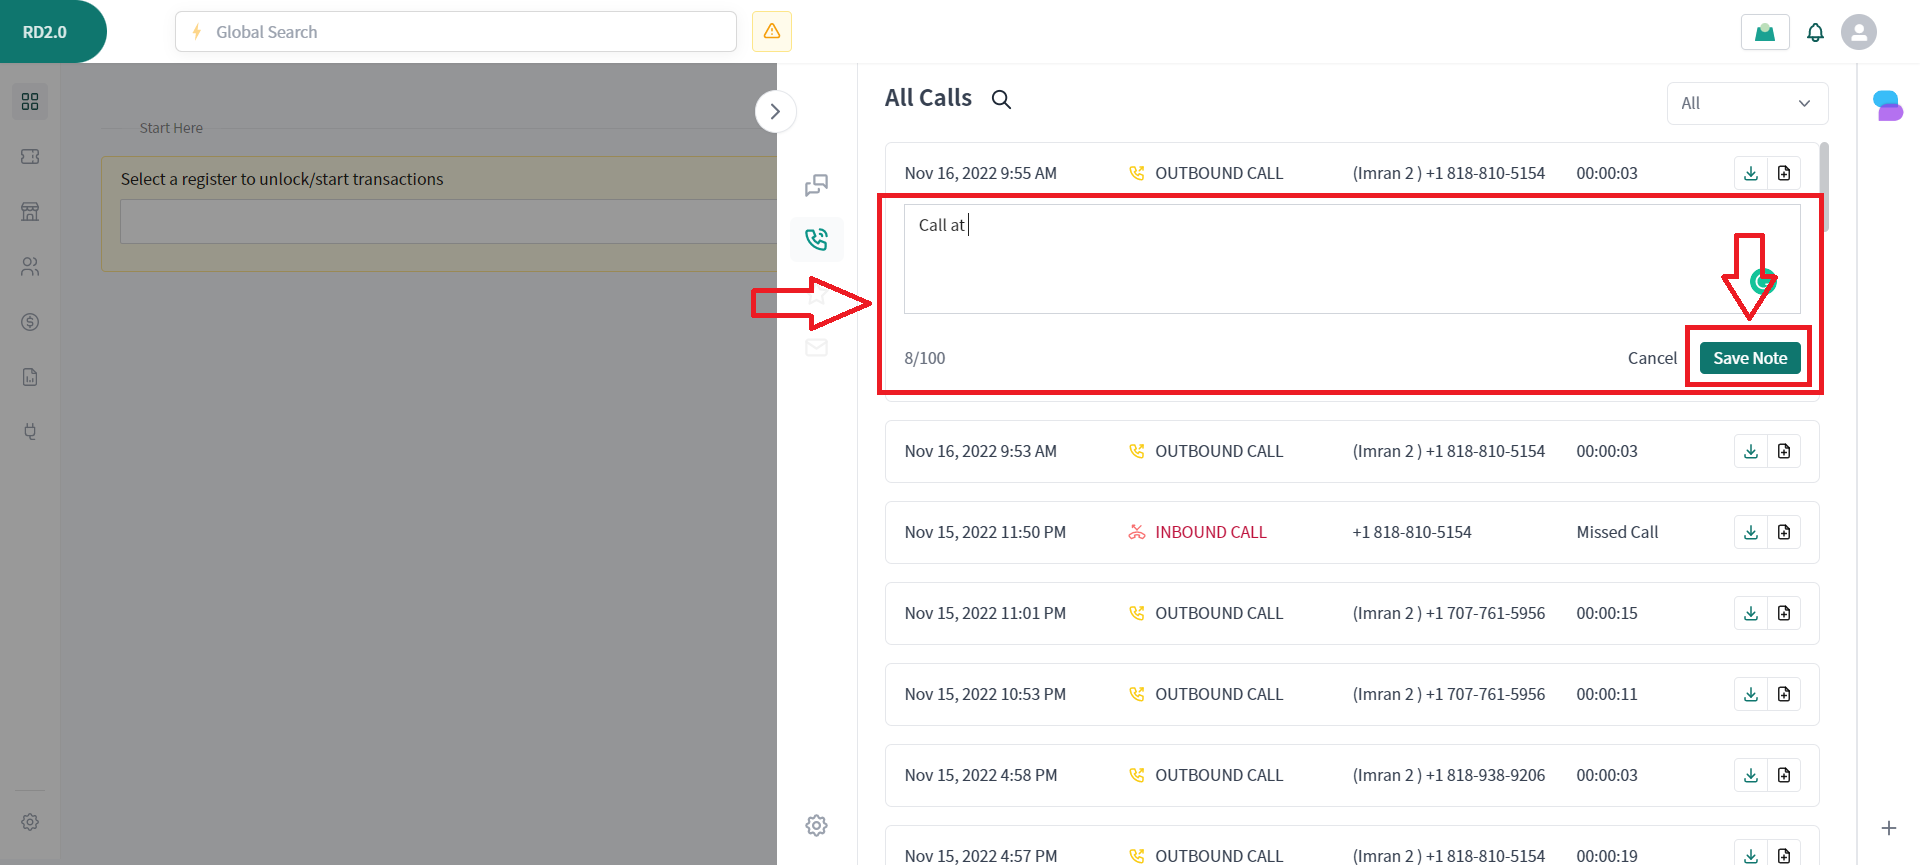
+b. To add the Notes, a small Icon on the right-hand side with the Download button allows you to add them.
+
+c. To listen to the call, the Download icon will redirect to another page with the recording. You can also apply filters in your call listing.
+
+
+
+d. Clicking on the Icon will open up a Field box which will allow you to enter notes.
+
+e. Press Save Note to Attach the Notes.
+
+