Revision: d75367e387
Edited Add Customers
@@ -1 +1,55 @@
-New Wiki Page
+Customers are the most important asset of any business. We understand that you value your customers and would love your POS to be able to manage customers well for you. RepairDesk gives you the power to create new customers or import the previous ones, edit the existing customers, divide customers into various groups, and much more.
+
+Add Customers
+-------------
+
+The fast pace of the customers requires you to switch from your old rusty register and ink pens to smarter solutions. However, we understand that a lot of energy and time goes into managing a list of customers, and entering every name one by one can be a mess. We offer you two ways to add customers to your RepairDesk shop.
+
+### Import Existing Customers
+
+To help save you time of entering details of your existing customers, we have designed an easy way to import your old data into your all-new RepairDesk repair POS.
+
+> Path: \\Customers > All Customers
+
+Open the path above before you begin to follow the steps mentioned below.
+
+1. Reach to the top right corner of the screen and click on the **Import** button.
+2. If you have the details of the customers stored on a spreadsheet file, drag and drop it in the _Upload Customer History Data_ section. You can also click on this section to upload from your computer’s browser.
+3. You can download a sample sheet to fill in. Once done, upload the sheet by following the step mentioned above.
+
+
+
+1. Next, you can map data in the sheet to your RepairDesk database and click on the **Next Step** button.
+2. You can check the import overview on the next screen and click on the **Confirm Import** button, which will open a validation window asking you to confirm your import.
+3. Clicking on the **Confirm** button will have your data imported from the sheet to the RepairDesk database.
+
+
+
+1. The new screen opened will allow you to upload a spreadsheet file with the details of your customers.
+
+### Add a New Customer
+
+RepairDesk allows you to add new customers for times when you are ready to run your shop with us. It is as simple and easy as it gets. You have to follow the same path given in the last section. Once done, follow the steps below.
+
+1. Click on the **Add Customer** button at the top right corner of the screen.
+2. In the new window, add customer details like first name, last name, mobile number, cell number, and email address in the basic information.
+3. The picture of the customer can be added by clicking on the image box and uploading the picture.
+4. Right below the image box, you can add at max 5 tags with the customer's profile. These tags are introduced to make it easy for you to search customers.
+5. You can also add the customer in any of the existing groups by selecting from the dropdown of **Customer Group**.
+
+
+
+1. Additional Information section allows you to add other details including country, city, and postal code, etc.
+2. You can add custom fields if desired by clicking on the **Add Custom Field** button at the end of the screen.
+3. You can make the customer as [GDPR compliant](https://docs.repairdesk.co/gdpr_compliance) according to the EU Regulations on adding the new customer.
+4. Turn on the **Alert Notifications** toggle to send notifications. Click the **Save** button to add the customer to your database.
+
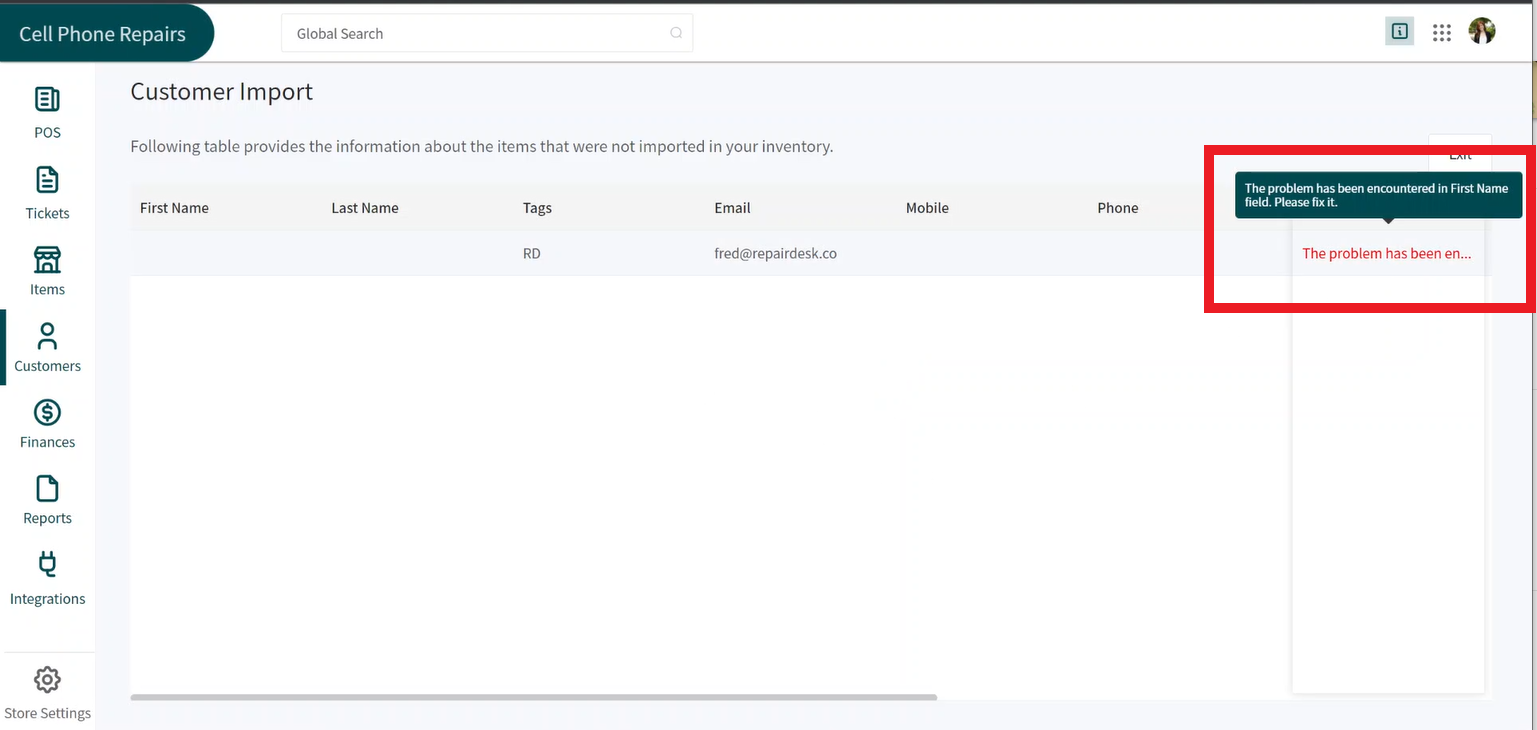
+**_Fun Facts:_**
+
+At times, your file is rejected for data import and you end up confused as to what caused it. We have made RepairDesk smarter than other POS so, you actually get to know what went wrong. Once you are done importing data and a new pop-up screen opens with the import status, click on the **Click Here** button in the last line. This will open a new window with the details of import issue mentioned in red.
+
+
+
+Moreover, you can also edit the view of your customer details. Click on the **Edit Table** button present on the top right corner of the _Manage Customers_ screen. It will open a dropdown for you to select the details you can add to your view.
+
+You are all set to import your existing customers and add new customers with us every step of the way!👌