Revision: d0416470fc
Edited Categories Setting
@@ -1 +1,21 @@
-New Wiki Page
+It is always a good idea to divide the products in categories rather than putting them randomly. Categorization makes it easy for the shop owners to organize their items and sell them in a better way. RepairDesk understands your need for categorizing the products in your shop. This is why it has a separate settings section available to cater to your needs. You can access the settings for categorization by following the path below.
+
+Path: \\Settings > Store > Module Configurations > Items Management > Categories
+
+If you have reached till _Items Management_, click on the _Categories_ tab available at the top to open settings.
+
+Add a New Category
+------------------
+
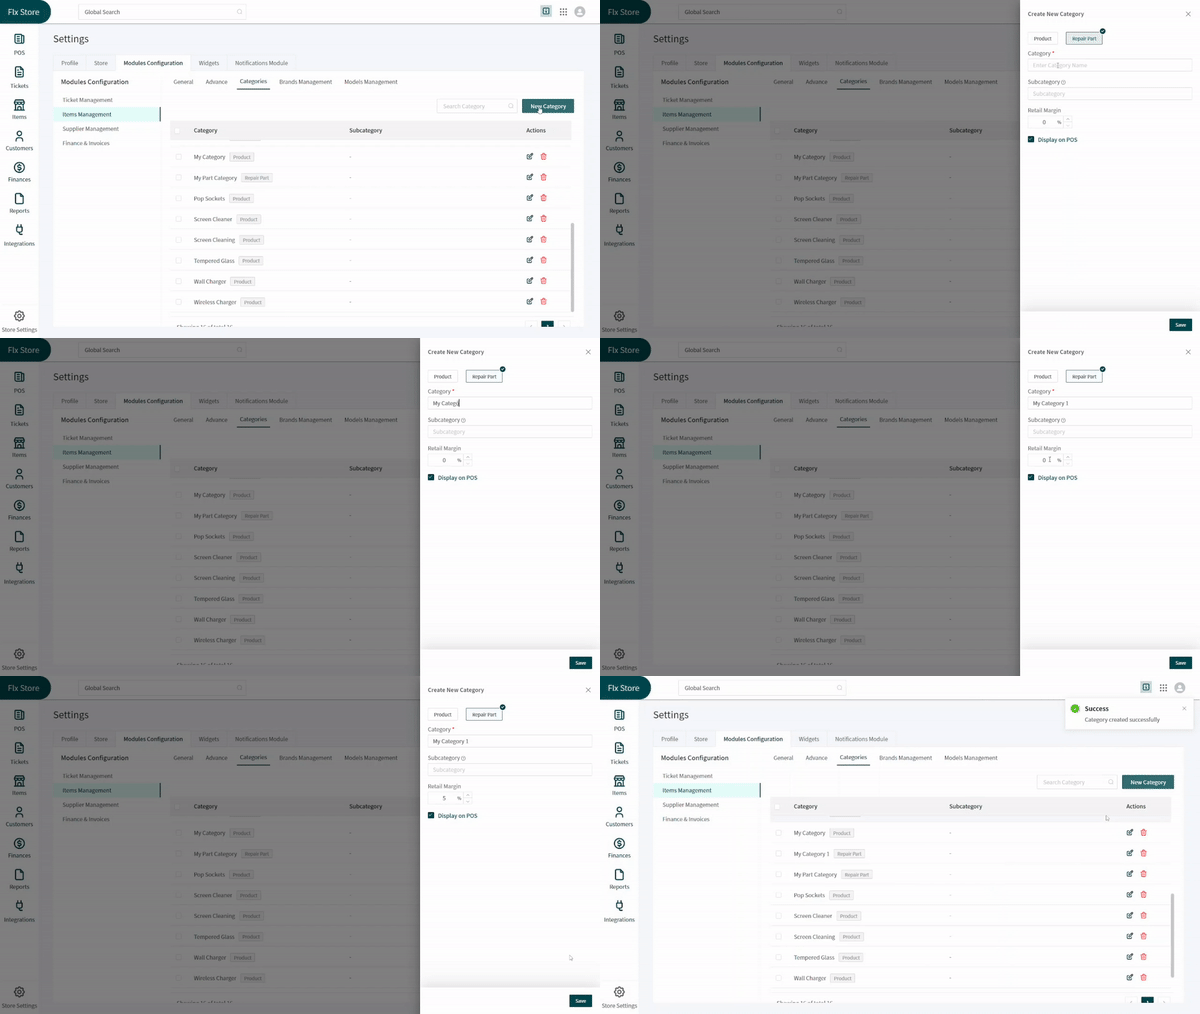
+1. Click on the **New Category** button available at the top right corner.
+2. Decide if your category is designed for a product or a repair part. Click on the selected button at the top.
+3. Enter the name for the category in the designated text box. In case it is a sub-category, add the name of the parent category in the **Category Name** text box and add the new category's name in the **Subcategory** text box.
+4. Set a retail margin from the given text box and check the checkbox available for the **Display on POS** to display the category/subcategory on your POS.
+5. Click on the **Save** button to save the settings.
+
+
+
+Edit a Category
+---------------
+
+You can edit a category available in the list by clicking on the **Edit (Pen)** icon in front of the desired category. It will open a window from the right side of the screen asking you to change whatever you want. You can change the name, subcategory name, retail margin and show on POS setting. When done, click on the **Update** button at the bottom right to save the changes.