Revision: a69713c708
Edited RepairDesk Payments (hasnain)
@@ -6,7 +6,7 @@
RepairDesk Payments is a new feature introduced for the ease of our customers. It allows the shop owners to receive payments from the customers via their credit or debit cards. Here are some of the benefits you can enjoy with RD Payments integration:
1. **No Extra Setup**: RD Payments are easy to integrate as it is our very own module. You would not need to install any other applications or multiple devices to get your work done.
-2. **Save You Time**: RD Payments are easy to set up and takes you no more than 3 minutes. You can integrate and start receiving payments without wasting much time.
+2. **Save Your Time**: RD Payments are easy to set up and takes you no more than 3 minutes. You can integrate and start receiving payments without wasting much time.
3. **Easy Settings**: As compared to other payment integrations, RD Payments provide you easy and minimal settings. You can perform different actions without switching between multiple screens and feeling overwhelmed.
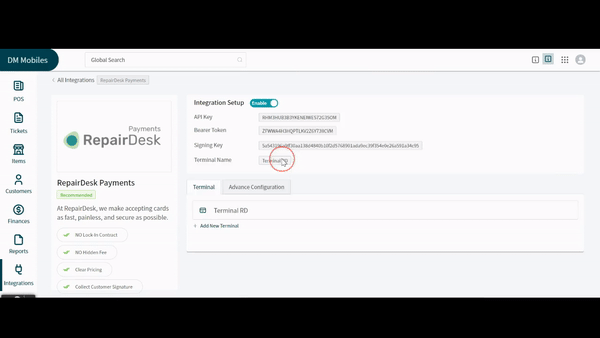
Integrate RD Payments
@@ -29,18 +29,27 @@
-
-
1. Once your terminal is properly connected and running, click on the **Test** button at the bottom right to test the terminal.
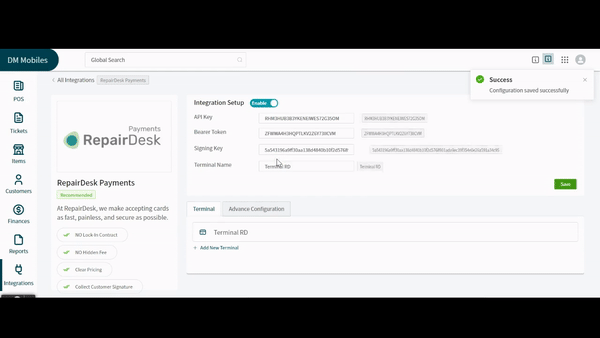
2. Now, click on the **Save** button to save the terminal. You will see the terminal live in the terminals below.
3. Click on the _Advance Configuration_ tab to open further settings.
4. Use the given toggles to turn on or off tipping, cash discount, and customer signature. Turning on toggle against any feature will display an option for that particular feature on the payment terminal.
5. You can use the text box assigned for **Terms and Conditions** to add all the important points you would like to show on the payment terminal for RD Payments.
-6. You can also enable or disable the option of **Pay Now** for your customers who want to pay from RD Payment's terminal.
+6. You can also enable or disable the option of **Pay Now** for your customers who want to pay through a link in email.
7. Use the buttons for **Promotional Image**, **Promotional Video** and **Slideshow** to add the respective media to your terminal.
8. Click on the **Save Settings** button at the bottom right corner to save changes done to the settings.
+
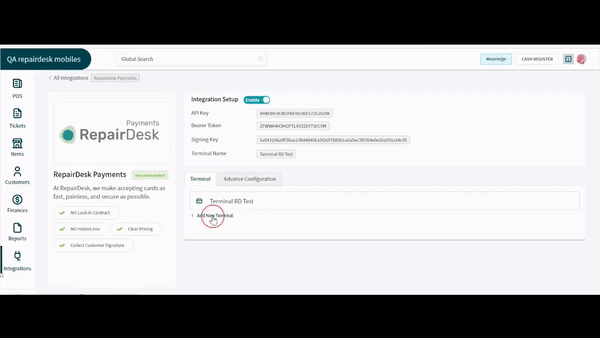
+### Multiple Terminals
+
+RD Pay allows you to integrate multiple terminals for your ease. To do so, follow the steps below:
+
+1. On the integration page of **RD Payments**, click on **+Add New Terminal** button placed at the bottom of the _Terminal_ section.
+2. On the window sliding from right, add the name of the terminal given by BlockChyp and click on the **Test** button.
+3. Now, click on the **Save** button at the bottom of the screen to save new terminal.
+4. Once done, you would be able to see this terminal among the payment terminal options when proceeding with RD Pay on your invoices.
+
+
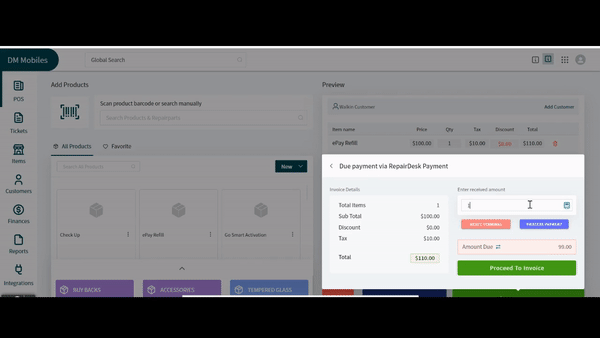
Accept Payment from RD Payments
-------------------------------
@@ -68,3 +77,34 @@
3. From the new popup, you can either select from the given buttons of **Print Invoice**, **Print Thermal Receipt**, **Email Invoice** or **View Invoice**.
+
+Card not Present (CNP) Transactions
+-----------------------------------
+
+### **Sending Invoice links through Emails**
+
+**RepairDesk** Payments tries to make the hassle of payments easier for their users and their customers. We acknowledge how important time saving for our customer is. Therefore, **RepairDesk** Payments allows you to email an **invoice link** to your customer who is not even present at the premises with you.
+
+1. The first step is to go to **integrations** and make sure you have **RepairDesk** Payments enabled. Click the advanced configuration button to make sure you check the “would you like to email invoice with a **pay now** button”? As shown below.
+2. Once that has been checked. Make sure the settings have been saved by clicking the **“save settings”** on the bottom right and refresh your page. You should now be able to send an **email invoice link** through your invoices.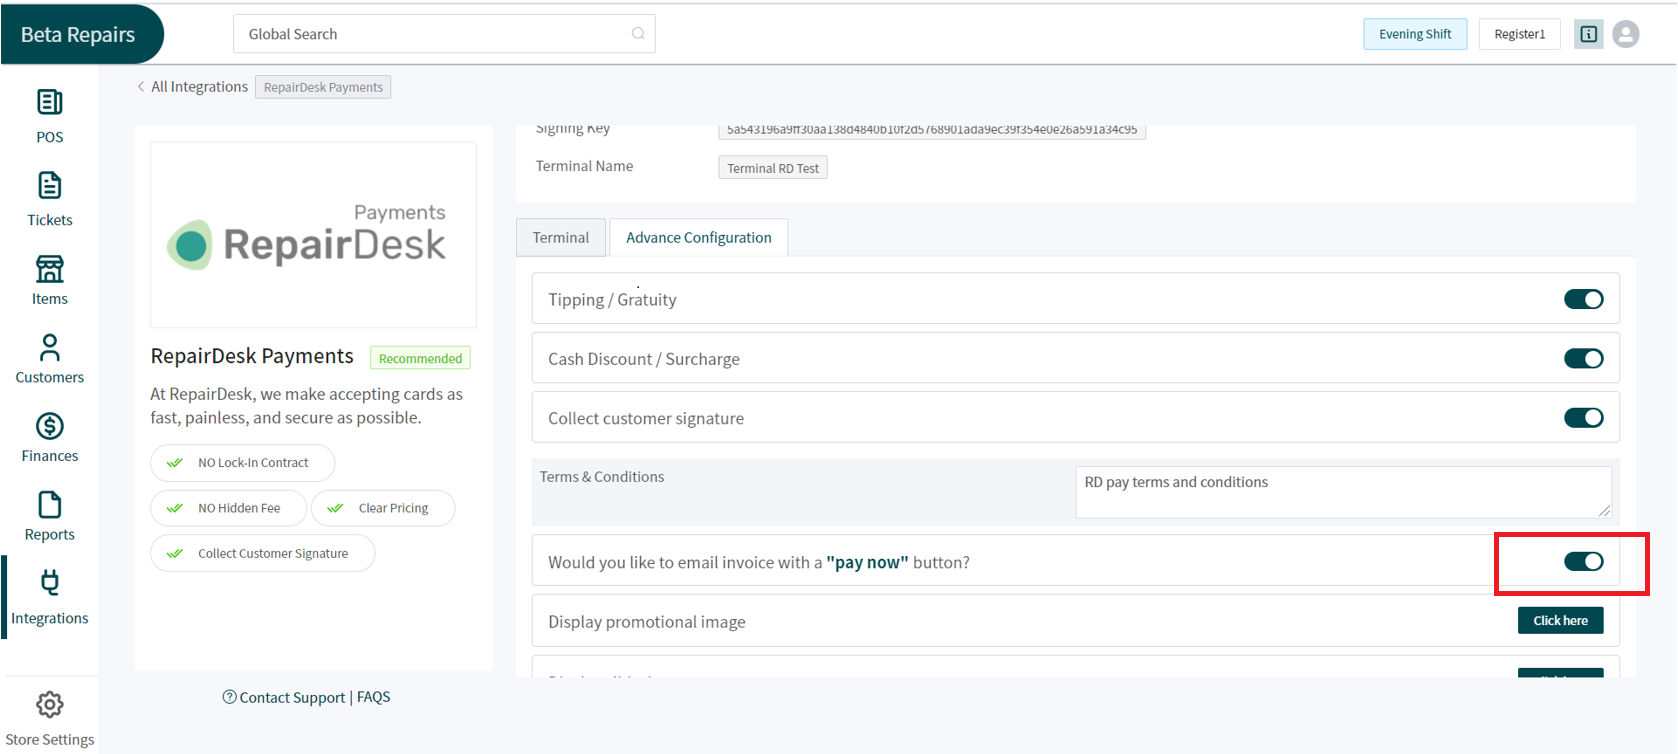
+3. To send an email, just go to the finances section and click on the invoices option. Once you see your invoice, click on the options (three dots).
+4. This would show you the option to email your invoice to your customer who can then fill out their payment details to complete the transaction.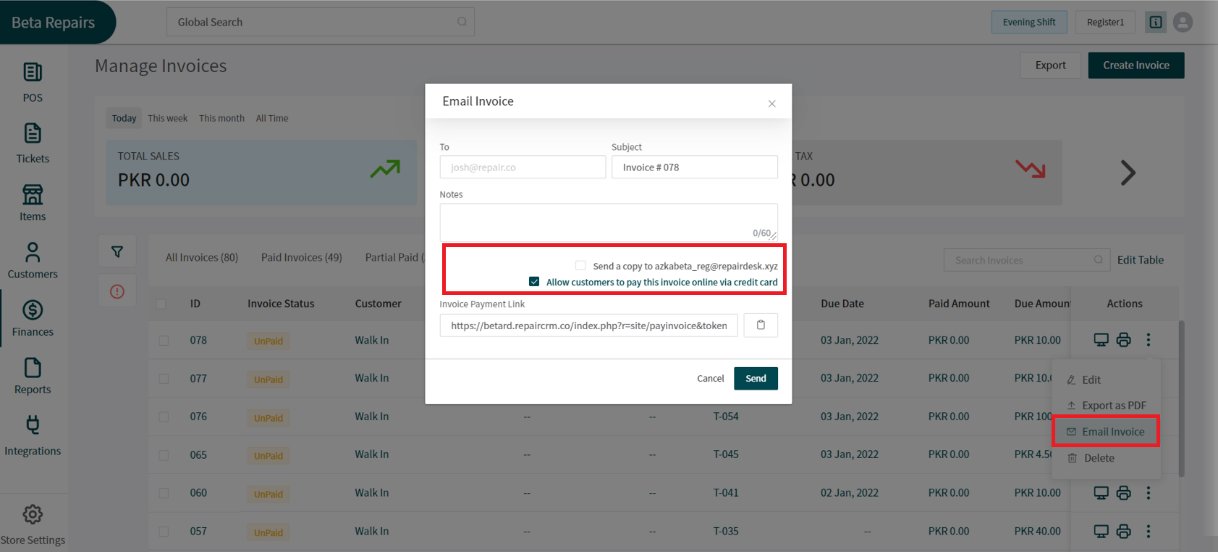
+
+**1.1** You can also send an email invoice link with the invoice open. Repair desk enables the users to save time of the hard-working individuals.
+
+**1.2** Click open an invoice using the **invoice ID**.
+
+**1.3** With the invoice open you can click the email icon to send the same email and enable your customer to pay virtually.
+
+### **Sending an invoice link through the POS**
+
+Another gateway to use this feature is to send an email after a transaction of a partial transaction. Repair Desk enables this access in case the customer is not carrying any cash on them.
+
+When checking out a customer for a transaction use the steps below
+
+1. Proceed to **check out** and use any payment method that is applicable according to your customer.
+2. Click on proceed to invoice and then select **email invoice**.
+3. The following pop up will be displayed to you.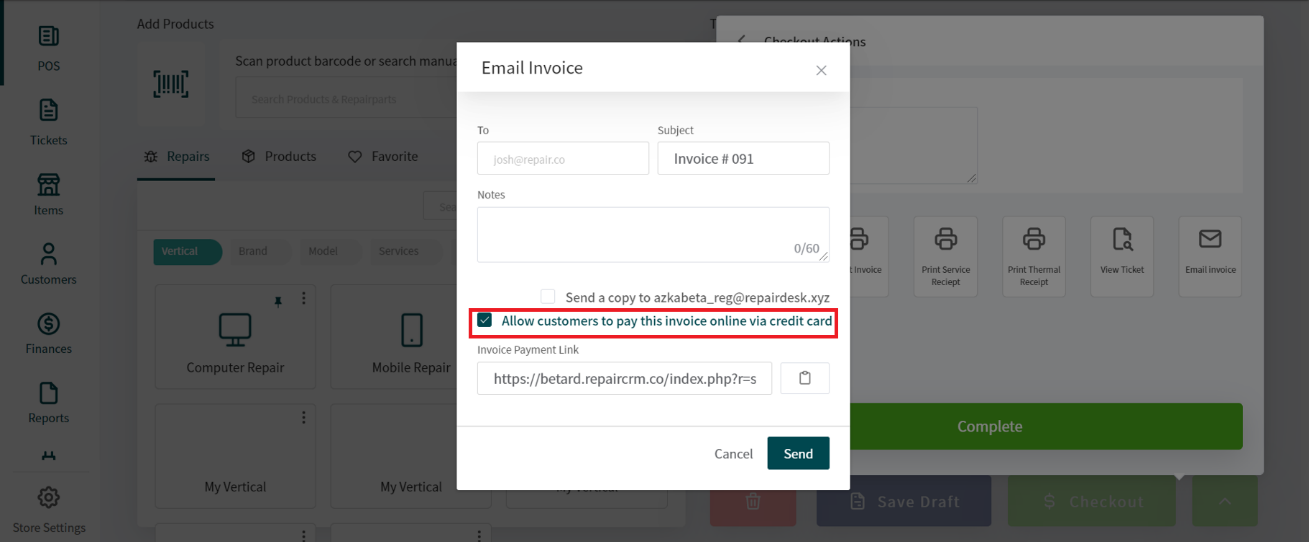
+4. Make sure you check the **Allow customers to pay this invoice via credit card** option.
+
+Your customer will receive an email through which they can submit their dues virtually.