Revision: 9fd5236b68
Edited General Setup
@@ -1 +1,15 @@
-New Wiki Page
+The majority of the repair shops sell products along with services. Managing these products can be a huge task but with the right settings, it becomes easier than ever. RepairDesk allows its users to set some basic settings for their items module to have it run smoother. Here is the path for you to access general setup for the items module:
+
+> Path: \\Settings > Store > Module Configurations > Items Management > General
+
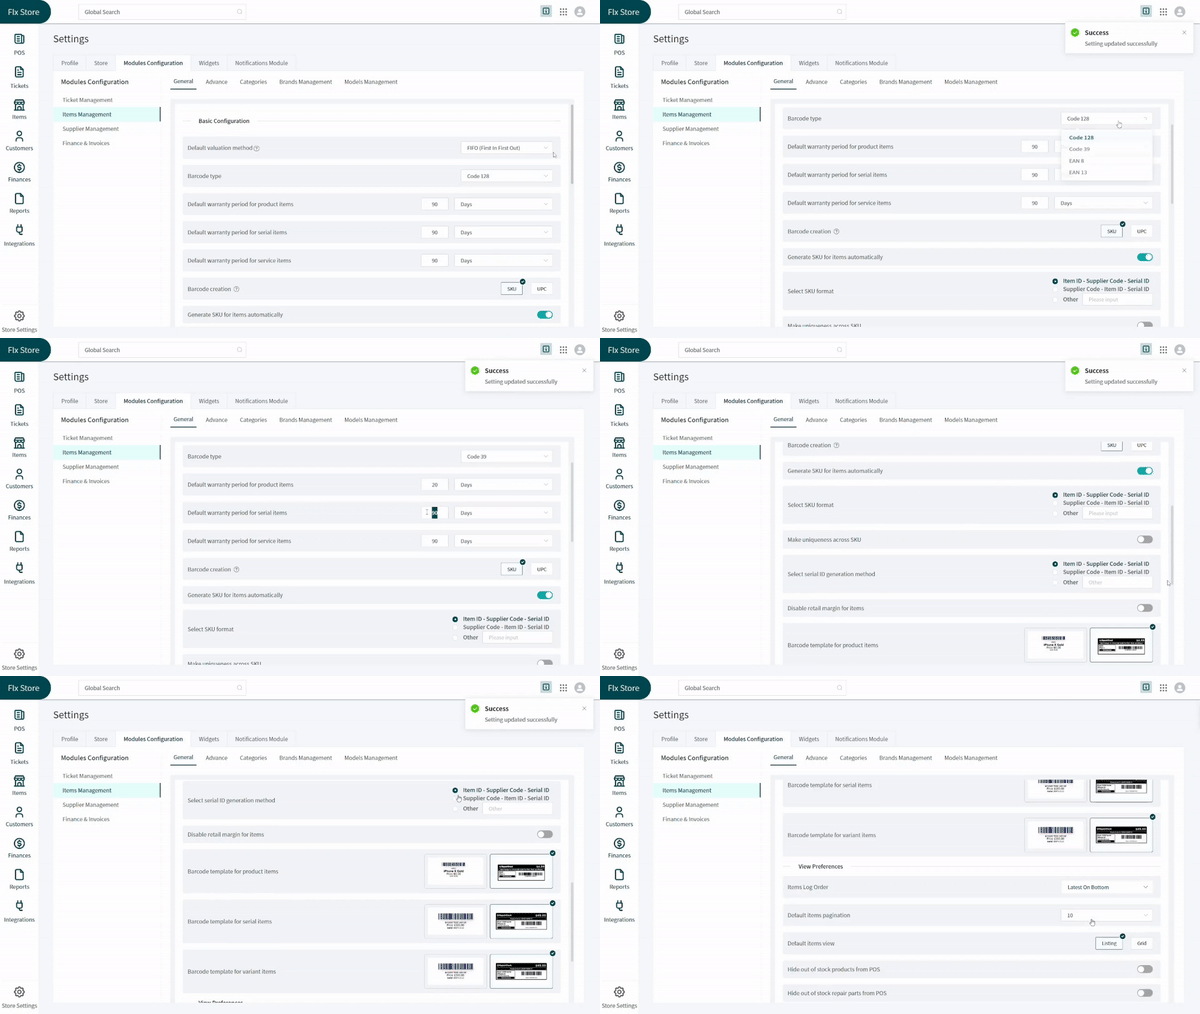
+You can click on the _Items Management_ from the list appearing on your left-hand side. Once done, check from the top of the screen that you are in the _General Setup_ tab. Now, follow these steps:
+
+1. You can click on the dropdown for _Default Valuation Method_ to assign a default evaluation for every new item. A valuation method defines the way you are going to sell items off of your shelves.
+2. In the _Barcode_ dropdown, you can select the coding you desire. Next three dropdowns allow you to define the warranty period for product items, serialized items and service items.
+3. For the barcode creation, you can choose if you want to use SKU or UPC for creating a barcode. You can also choose the format of the SKU from the given list and make it unique with the help of a toggle.
+4. Next, define the format for the ID generation. You can enable or disable the retail margin for the items from the designated toggle.
+5. You can select barcode templates for product items, serial items and variant items from the given options.
+6. Proceeding to the _View Preferences_ section, you can choose the way you would like to view and sort items through the **Default** **Items View** button and **Log Order** dropdown respectively.
+7. Select the number of items you would like to view by **Default Items Pagination** dropdown. Hide out of stock products from POS by turning on the toggle designated for it.
+
+