Revision: 8b8c57d6cb
Edited Customer Groups
@@ -1 +1,38 @@
-New Wiki Page
+Managing a growing customer base can be challenging at times. It becomes messier when you have to apply different taxes or offer discounts to a few people only. Searching customers by name to apply an offer can take you tens of hours so, RepairDesk offers you to organize your customers in groups.
+
+
+
+**_Fun Fact:_**
+
+Customer groups allow you to apply a discount or a different tax class to a number of customers in a single step. Details of all customers belonging to one firm can be fetched in a few clicks.
+
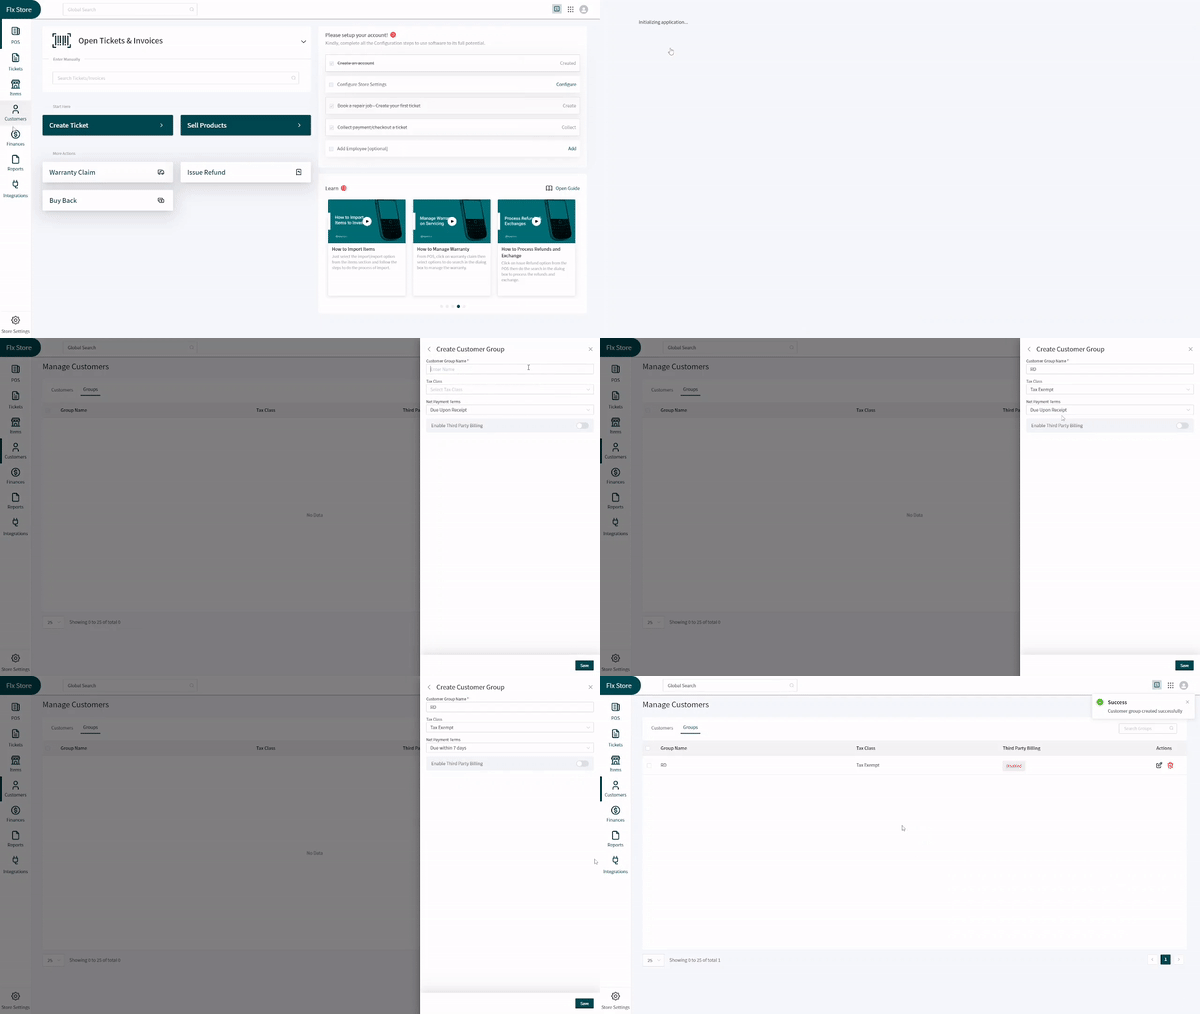
+Add Customer Groups
+-------------------
+
+In order to make a customer group, sign in to your RepairDesk account and follow the given path.
+
+> Path: \\Customers > Customer Groups
+
+You can find _Customer Groups_ under the **Manage Customers** tab. Once you have clicked on it, follow the following steps:
+
+1. Click on the **Add Customer Group** on the top right corner of the screen.
+2. A screen will slide in from the right corner. Assign a name for the customer group in the **Customer Group Name** text box.
+3. Click on the **Tax Class** dropdown and select the tax class you would like to apply to.
+4. **Net Payment Items** dropdown allows you to select the time you would like to receive payment from this customer group.
+5. To enable third-party billing, turn on the given toggle.
+6. Click the **Save** button when done with defining the settings for the new customer group.
+
+
+
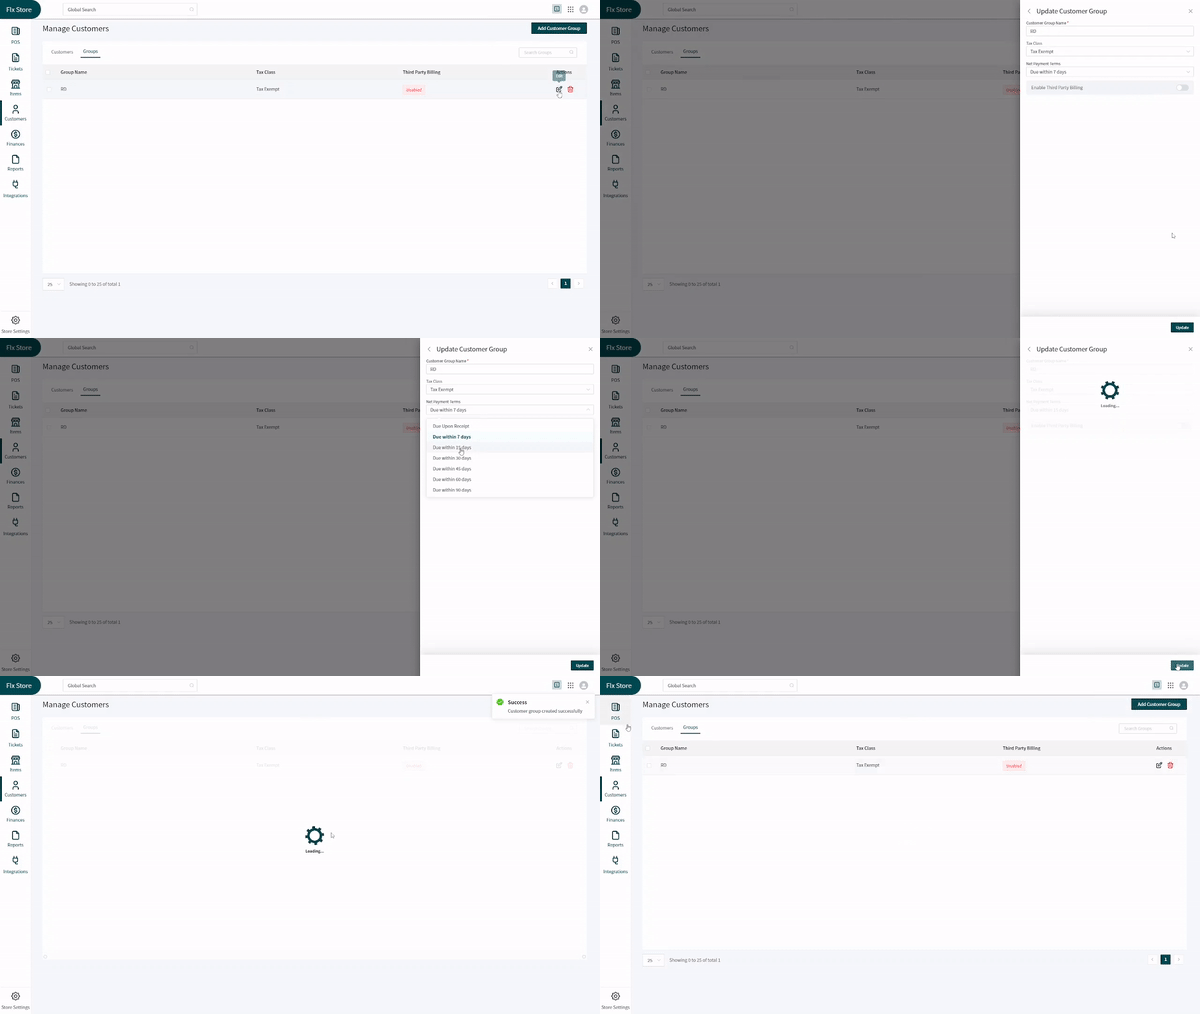
+Edit Customer Groups
+--------------------
+
+The usage of customer groups does not end at just creating them. There can be times when you might need to edit them or put them in the trash. In such conditions, we suggest you follow the same path given above and follow these steps:
+
+1. Select the customer group you want to delete and click on the **trash bin** icon next to it.
+2. In case you want to edit a customer group, click on the **Pen** icon next to it. It will open the same window on the right side that opens while you are creating a group.
+3. Change the details you want including customer group name, tax class, net payment terms, and third-party billing setting.
+
+
+
+With the customer groups enabled, you will have all customer-related billing and tax settings sorted. Now, save time and keep your customers happy with the easiest settings.👩👨