Revision: 860610931b
Edited Cash Register Setup
@@ -1 +1,65 @@
-New Wiki Page
+No repair shop is complete without a couple of cash drawers. They make your life easier than ever so, why not have them on your system as well? Luckily, RepairDesk allows you to map physical cash drawers to virtual cash drawers of your POS. You can keep track cash flow during multiple shifts and hold your employees accountable.
+
+**Managing a Cash Register**
+----------------------------
+
+Let's map your physical cash drawers to virtual cash registers. First, follow the following path and then the steps below:
+
+> Store Settings → Store → Cash Register
+
+### Setup a Cash Register
+
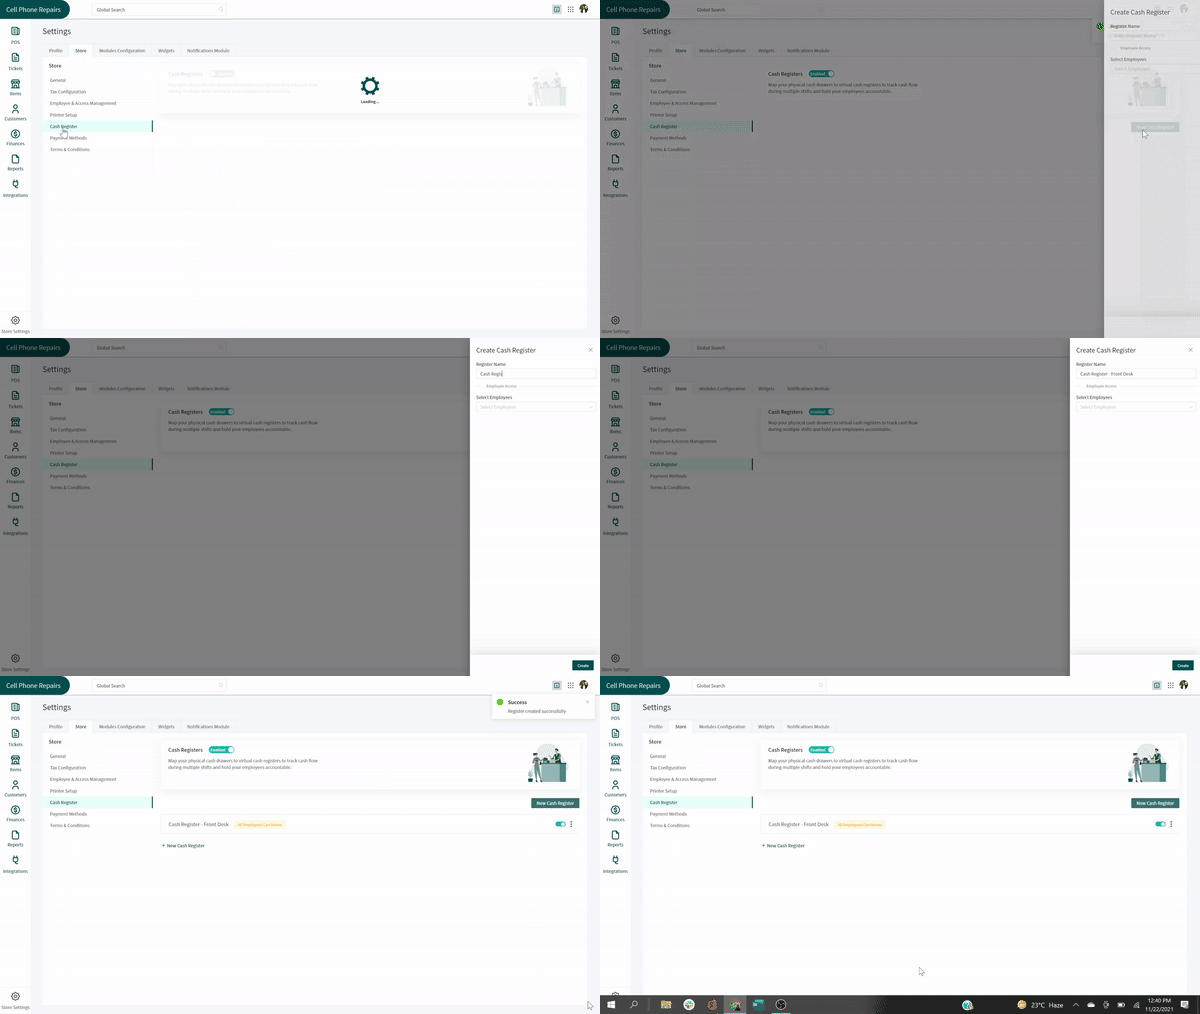
+1. Enable the module by clicking on the **Enable** button.
+2. Create a new cash register by specifying register name names and give access to employees.
+3. You can give access to one cash register to multiple employees.
+4. To perform any transaction register selection will be mandatory.
+5. Go to POS Home & select the register.
+6. After selecting the register you can see the amount present in the register and if anyone is already using it.
+
+
+
+### Start a Cash Register
+
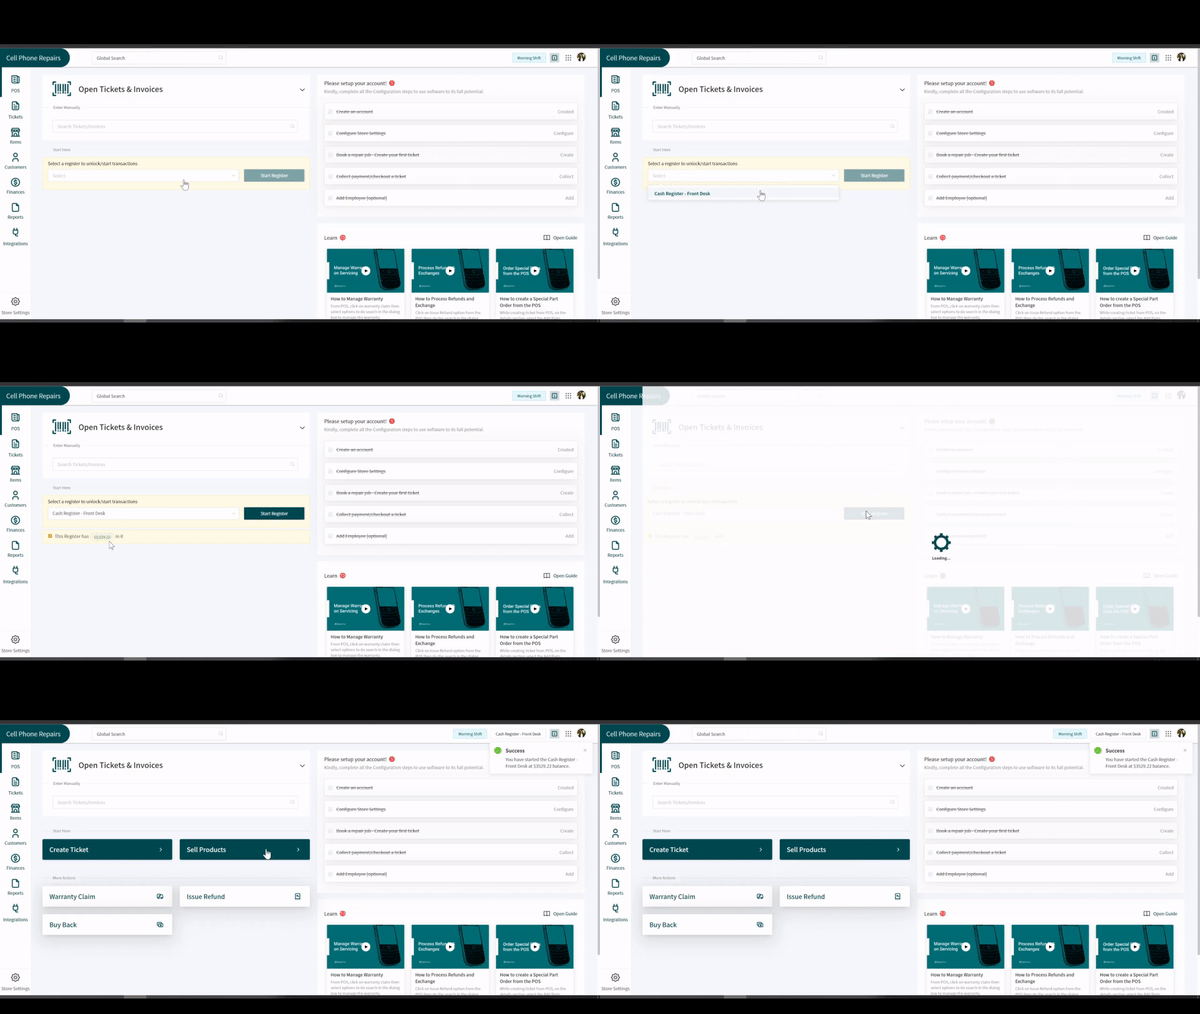
+Before you start putting money in or taking it out from a cash register, you have to start it. Here is how you can start a cash register:
+
+1. On the _POS_ screen, select a register from the dropdown of registers.
+2. Click on the **Start Register** next to the dropdown.
+3. You will see a success popup and options for various actions activated.
+
+
+
+### Join a Cash Register
+
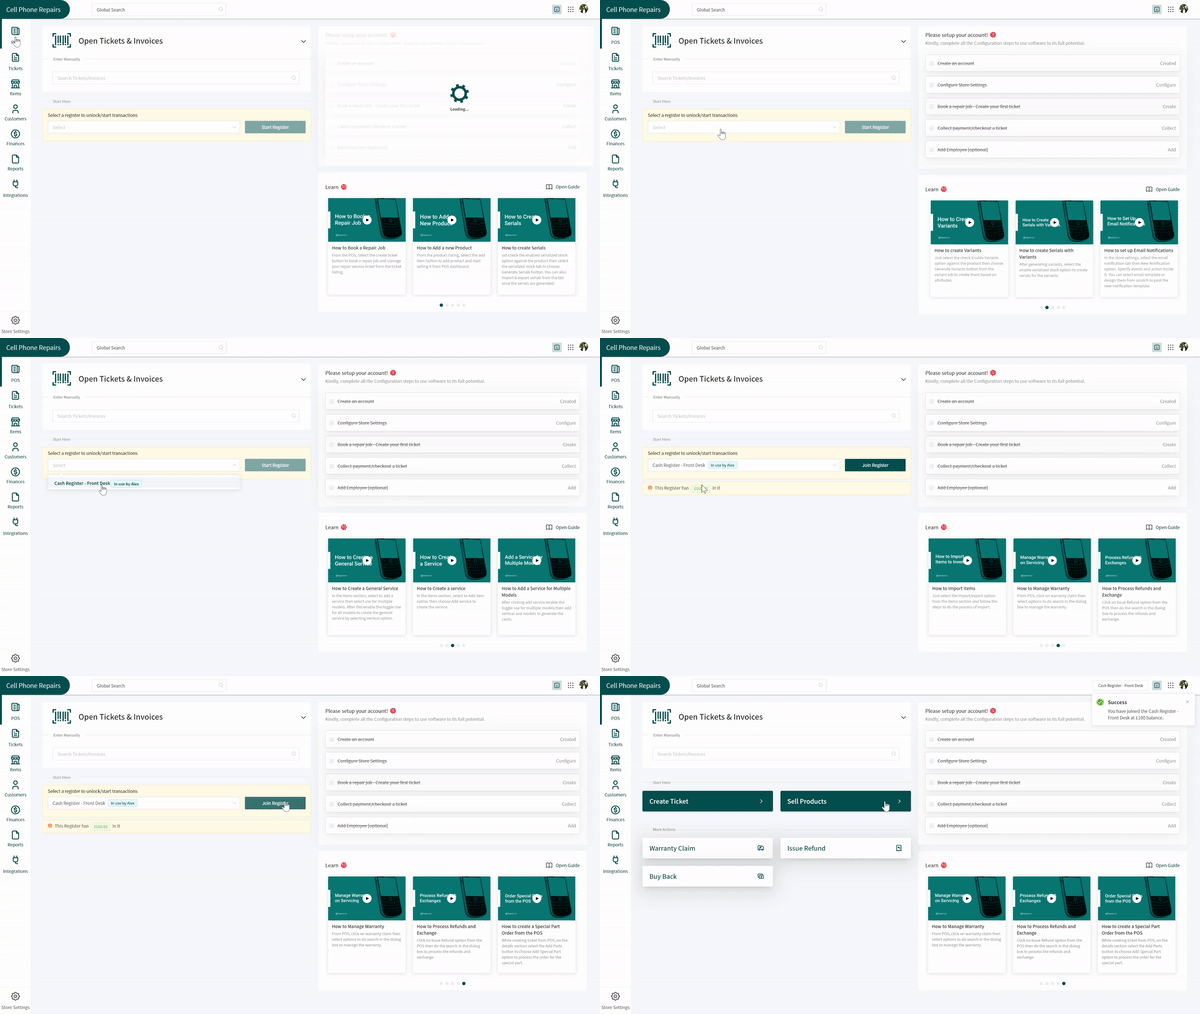
+Once a register has been opened, multiple employees from the store can join it to make transactions in it. Any user joining the register would be able to close it as well. If you want to learn how to do it, read the steps below:
+
+1. Join the register by clicking on the **Join Register** button
+2. Now when you perform any transaction it will be reflected in the cash register.
+3. You can "Cash In" or "Cash Out" from the register.
+
+
+
+### Cash In/ Cash Out
+
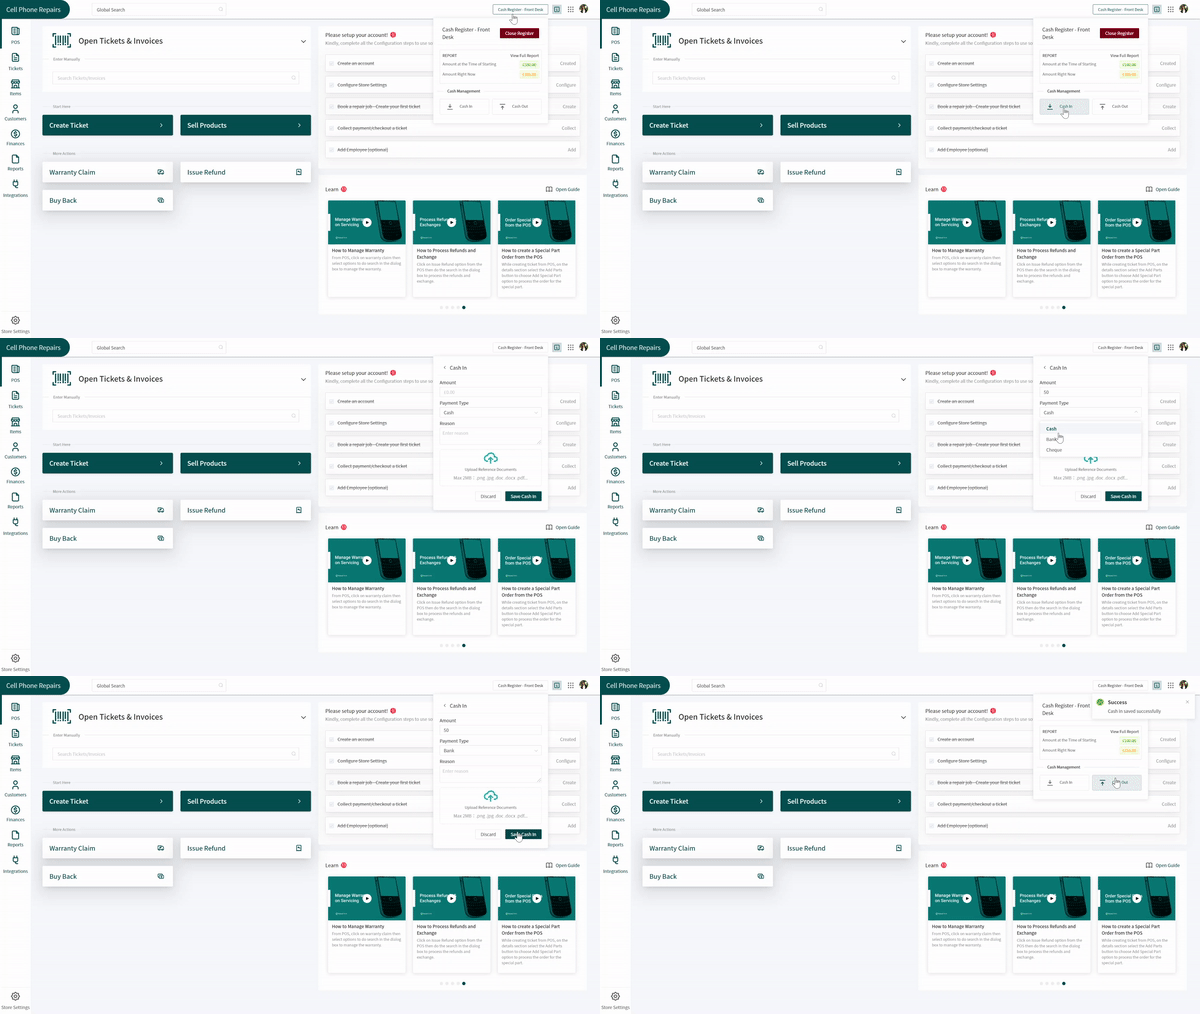
+1. Once you have your cash register all set, you can cash in and cash out by clicking on the **Cash Register Name** placed on the top right of your screen.
+2. It will open a small window for you. Click on the **Cash In** button at the bottom of the window to add money to your register or click on the **Cash Out** button if you want to take money out of the register.
+3. In the former case, add amount and reason in the designated text boxes. You can even upload documents if you want by clicking on the **Upload** button at the bottom. Once done, click on the **Save Cash In** button at the bottom.
+4. In the latter case, add amount to be deducted and reason in the designated text boxes. Upload documents if any by clicking on the **Upload** button at the bottom. Once done, click on the **Save Cash IO** button at the bottom.
+
+
+
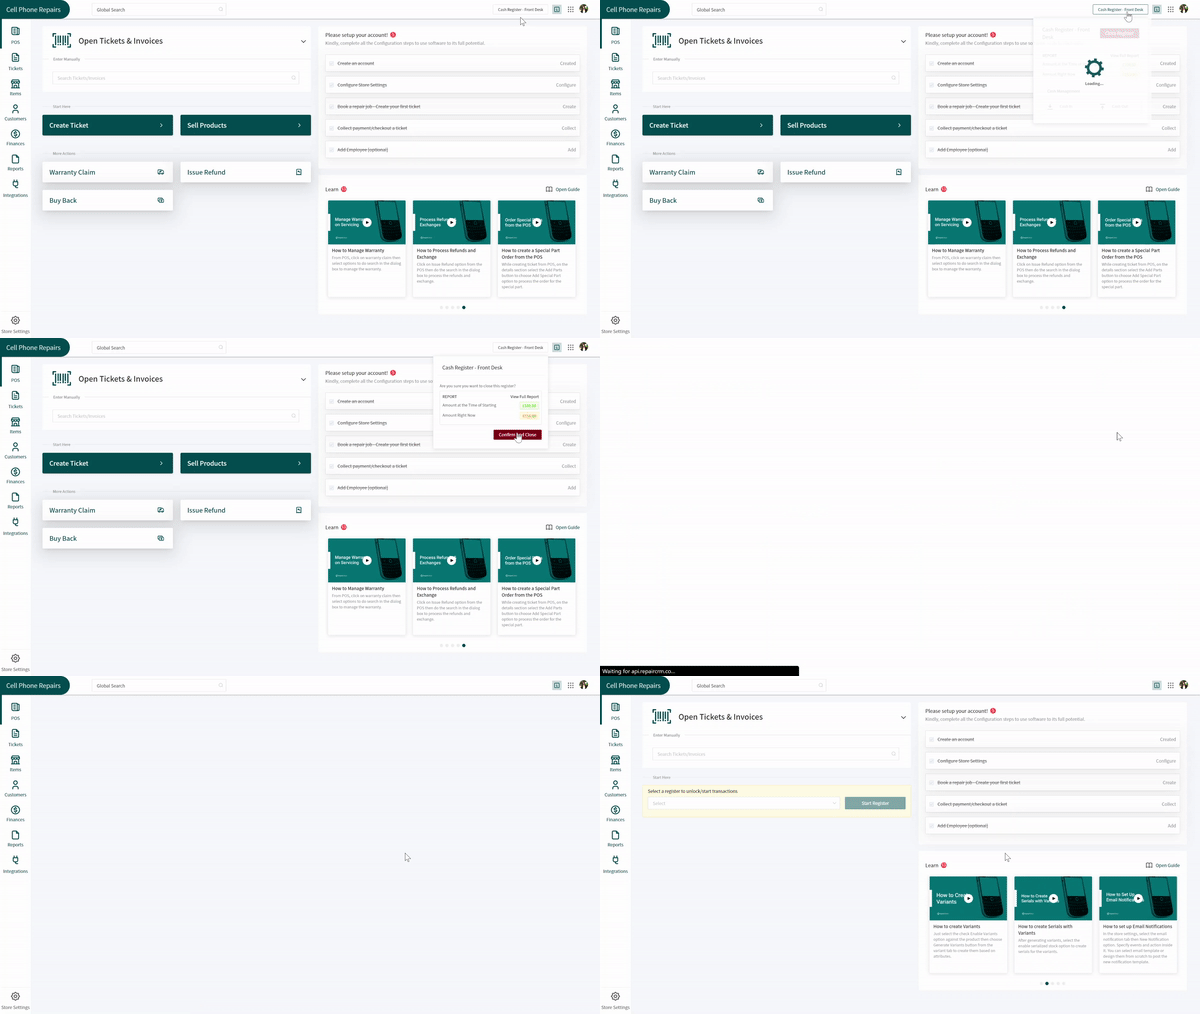
+### Close a Cash Register
+
+Once the work with register has been done, anyone who has joined/started the register can close it as well. Once it is closed, it will close for everyone using it. To make more transactions, you will have to open it again.
+
+1. To close the register click on "\`Close Register\`". Here you'll be presented with the information at which you joined the register and at the time you are closing the register.
+2. To track the revenue you can view "Cash Register Activity" by going to Reports.
+3. You can apply filters.
+4. Here you can see the cash register total and cash in/out activities.
+
+
+
+Quick Tips
+----------
+
+1. If a user starts a register and then either logs out or switch account without closing the register, the register will remain open. It can be joined again by the user whenever desired.
+2. Starting a register activates a register while joining a register enables a user to make transactions in an already opened register.