Revision: 37c07b050e
Edited Appointments
@@ -7,19 +7,15 @@
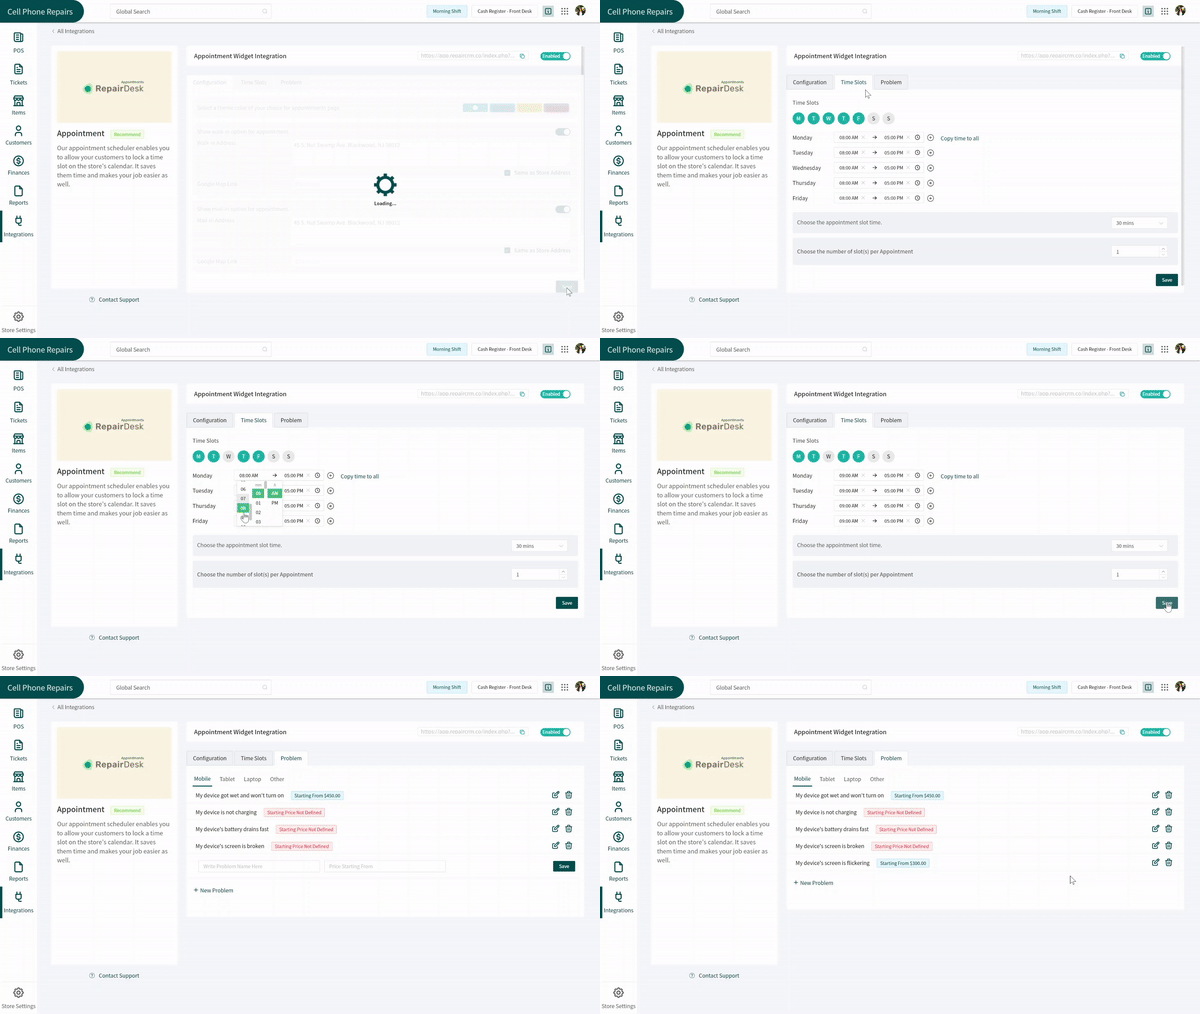
Here is how you can integrate the **Appointments**.
-1. Click on the Integrations\*\* button placed on the left side of the screen.
-2. From the number of integrations opened in front of you, find the **Appointments** title among all the tiles and click on **Set Up**.
-3. Click on **Enable**. This will generate a unique **URL** for you that you can place on your website and any platform so that customers can book appointments on your store.
+1\. Click on the Integrations\*\* button placed on the left side of the screen.
-.gif)
+2\. From the number of integrations opened in front of you, find the **Appointments** title among all the tiles and click on **Set Up**.
-1. In the configurations tab, you can specify “Store Address” and “Mail-in Address”
-2. In the Time Slots tab, you can configure the store visit timings that is when a customer can book an appointment.
-3. In the “Problems” tab you can specify the services that you provide in your store.
+3\. Click on **Enable**. This will generate a unique **URL** for you that you can place on your website and any platform so that customers can book appointments on your store. .gif)
-
+1\. In the configurations tab, you can specify “Store Address” and “Mail-in Address”
-
+2\. In the Time Slots tab, you can configure the store visit timings that is when a customer can book an appointment. 3. In the “Problems” tab you can specify the services that you provide in your store. 
### Admin Panel
@@ -27,9 +23,9 @@
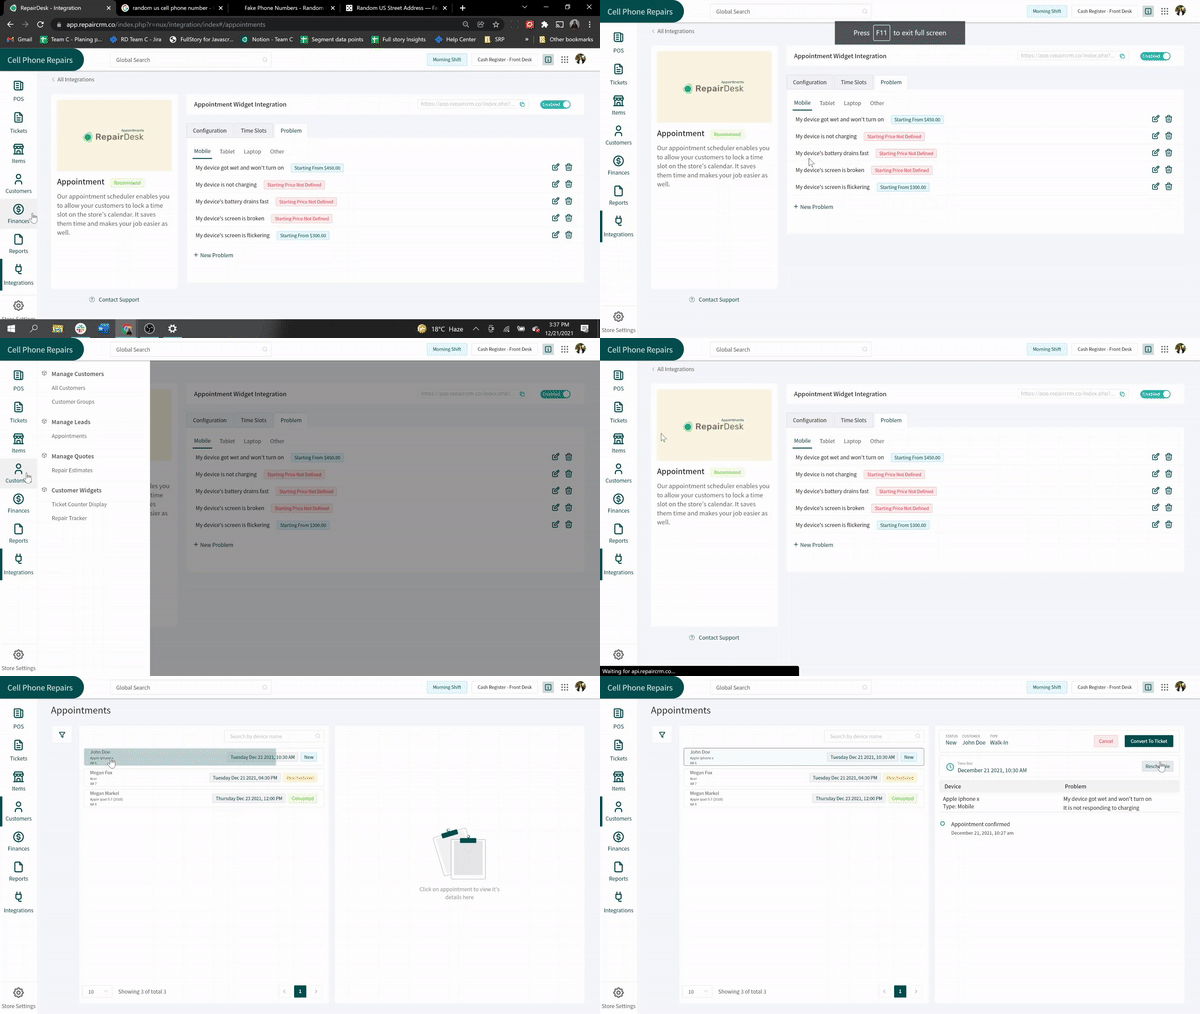
2. Here you can “**Reschedule**” the appointment. You can “**Cancel**” it.
3. Or you can “**Covert it to a ticket**”.
+
+

-
-
### Customer Side
@@ -37,12 +33,7 @@
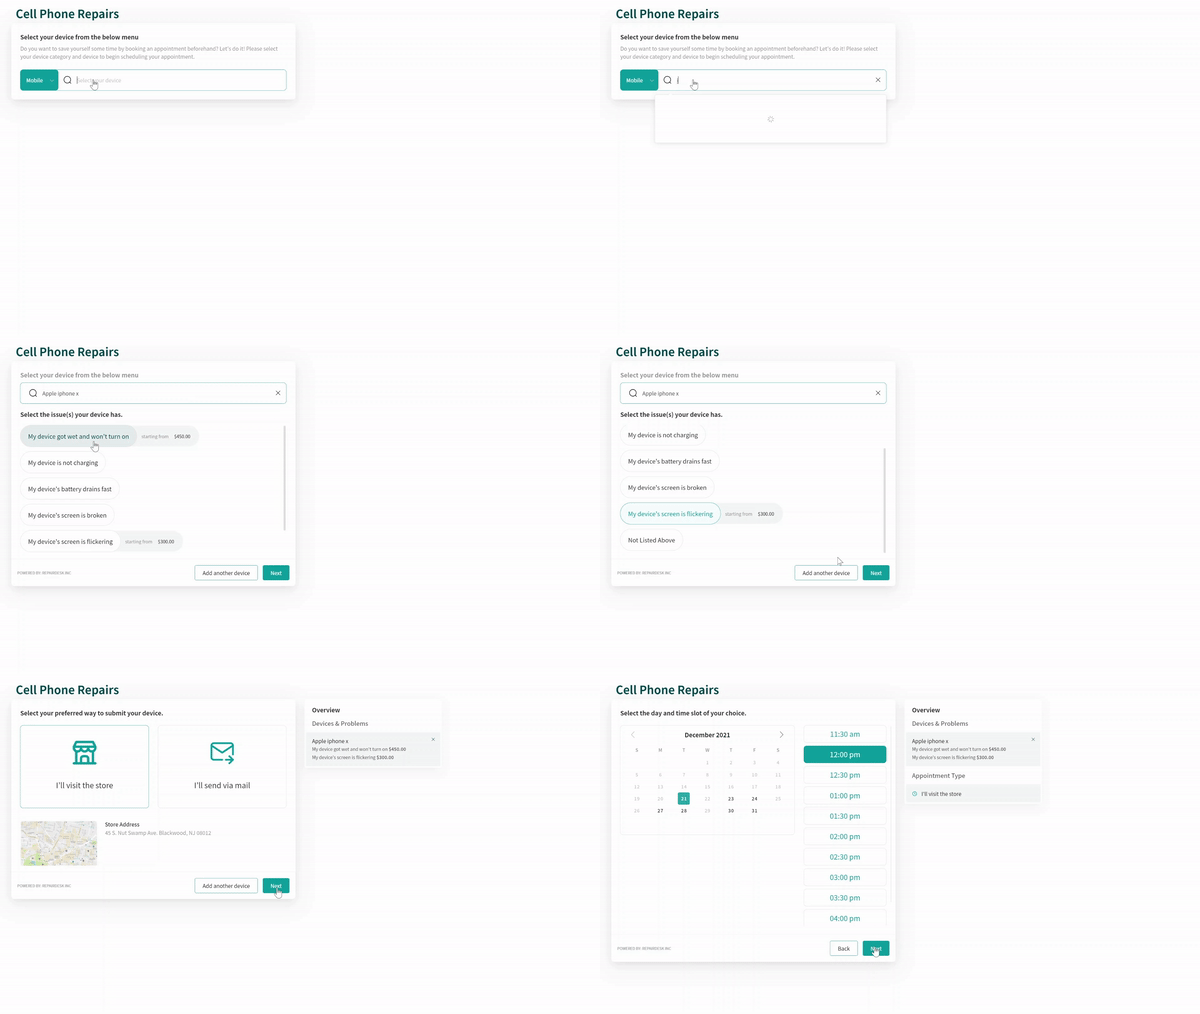
2. After **selecting the device name** customer can **select problems.**
3. After selecting the problem when the customer will proceed to the next screen. He will see an option one to “**visit the store**“ and second to “**send the device via mail**”.
4. If customers choose to “**visit the store**“ then appointment timings will be displayed.
-5. From where they can choose the time of their liking and click on next.
-
-
-
-1. Next, they will be presented with a form to enter the basic information
-2. After filing the form clicking on “Book Now” will book their appointment with you.
-3. They can also add the appointment to their calendar.
-
-
+5. From where they can choose the time of their liking and click on next. 
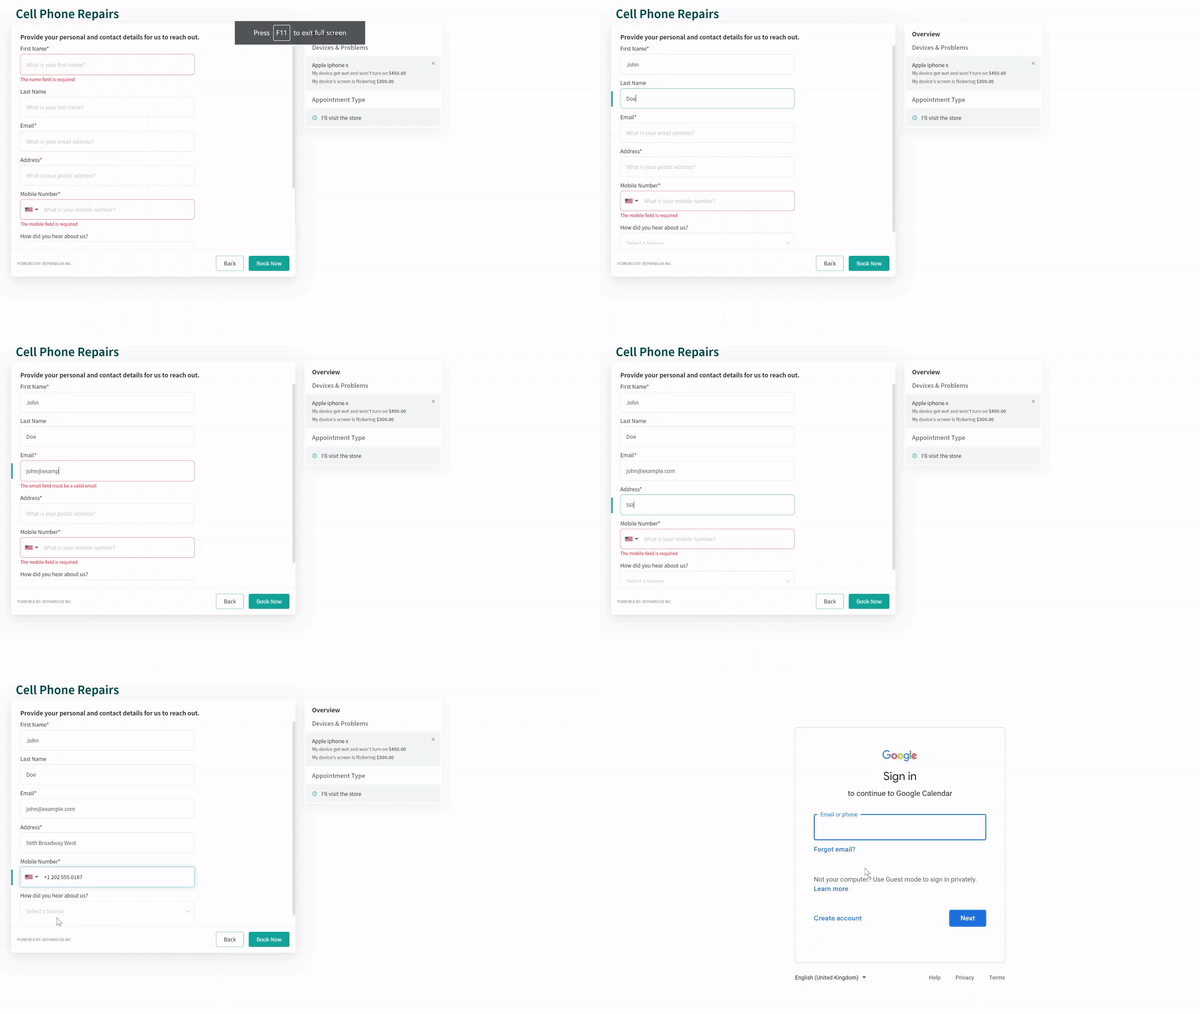
+6. Next, they will be presented with a form to enter the basic information
+7. After filing the form clicking on “Book Now” will book their appointment with you.
+8. They can also add the appointment to their calendar. 